ExpeditedWAF Setup and Onboarding
Expedited WAF automatically examines each web request to your Heroku application looking for potential attacks, blocking bad bots, stopping DDoS attacks, and increasing the overall security of your application.
This guide walks you through the installation steps.
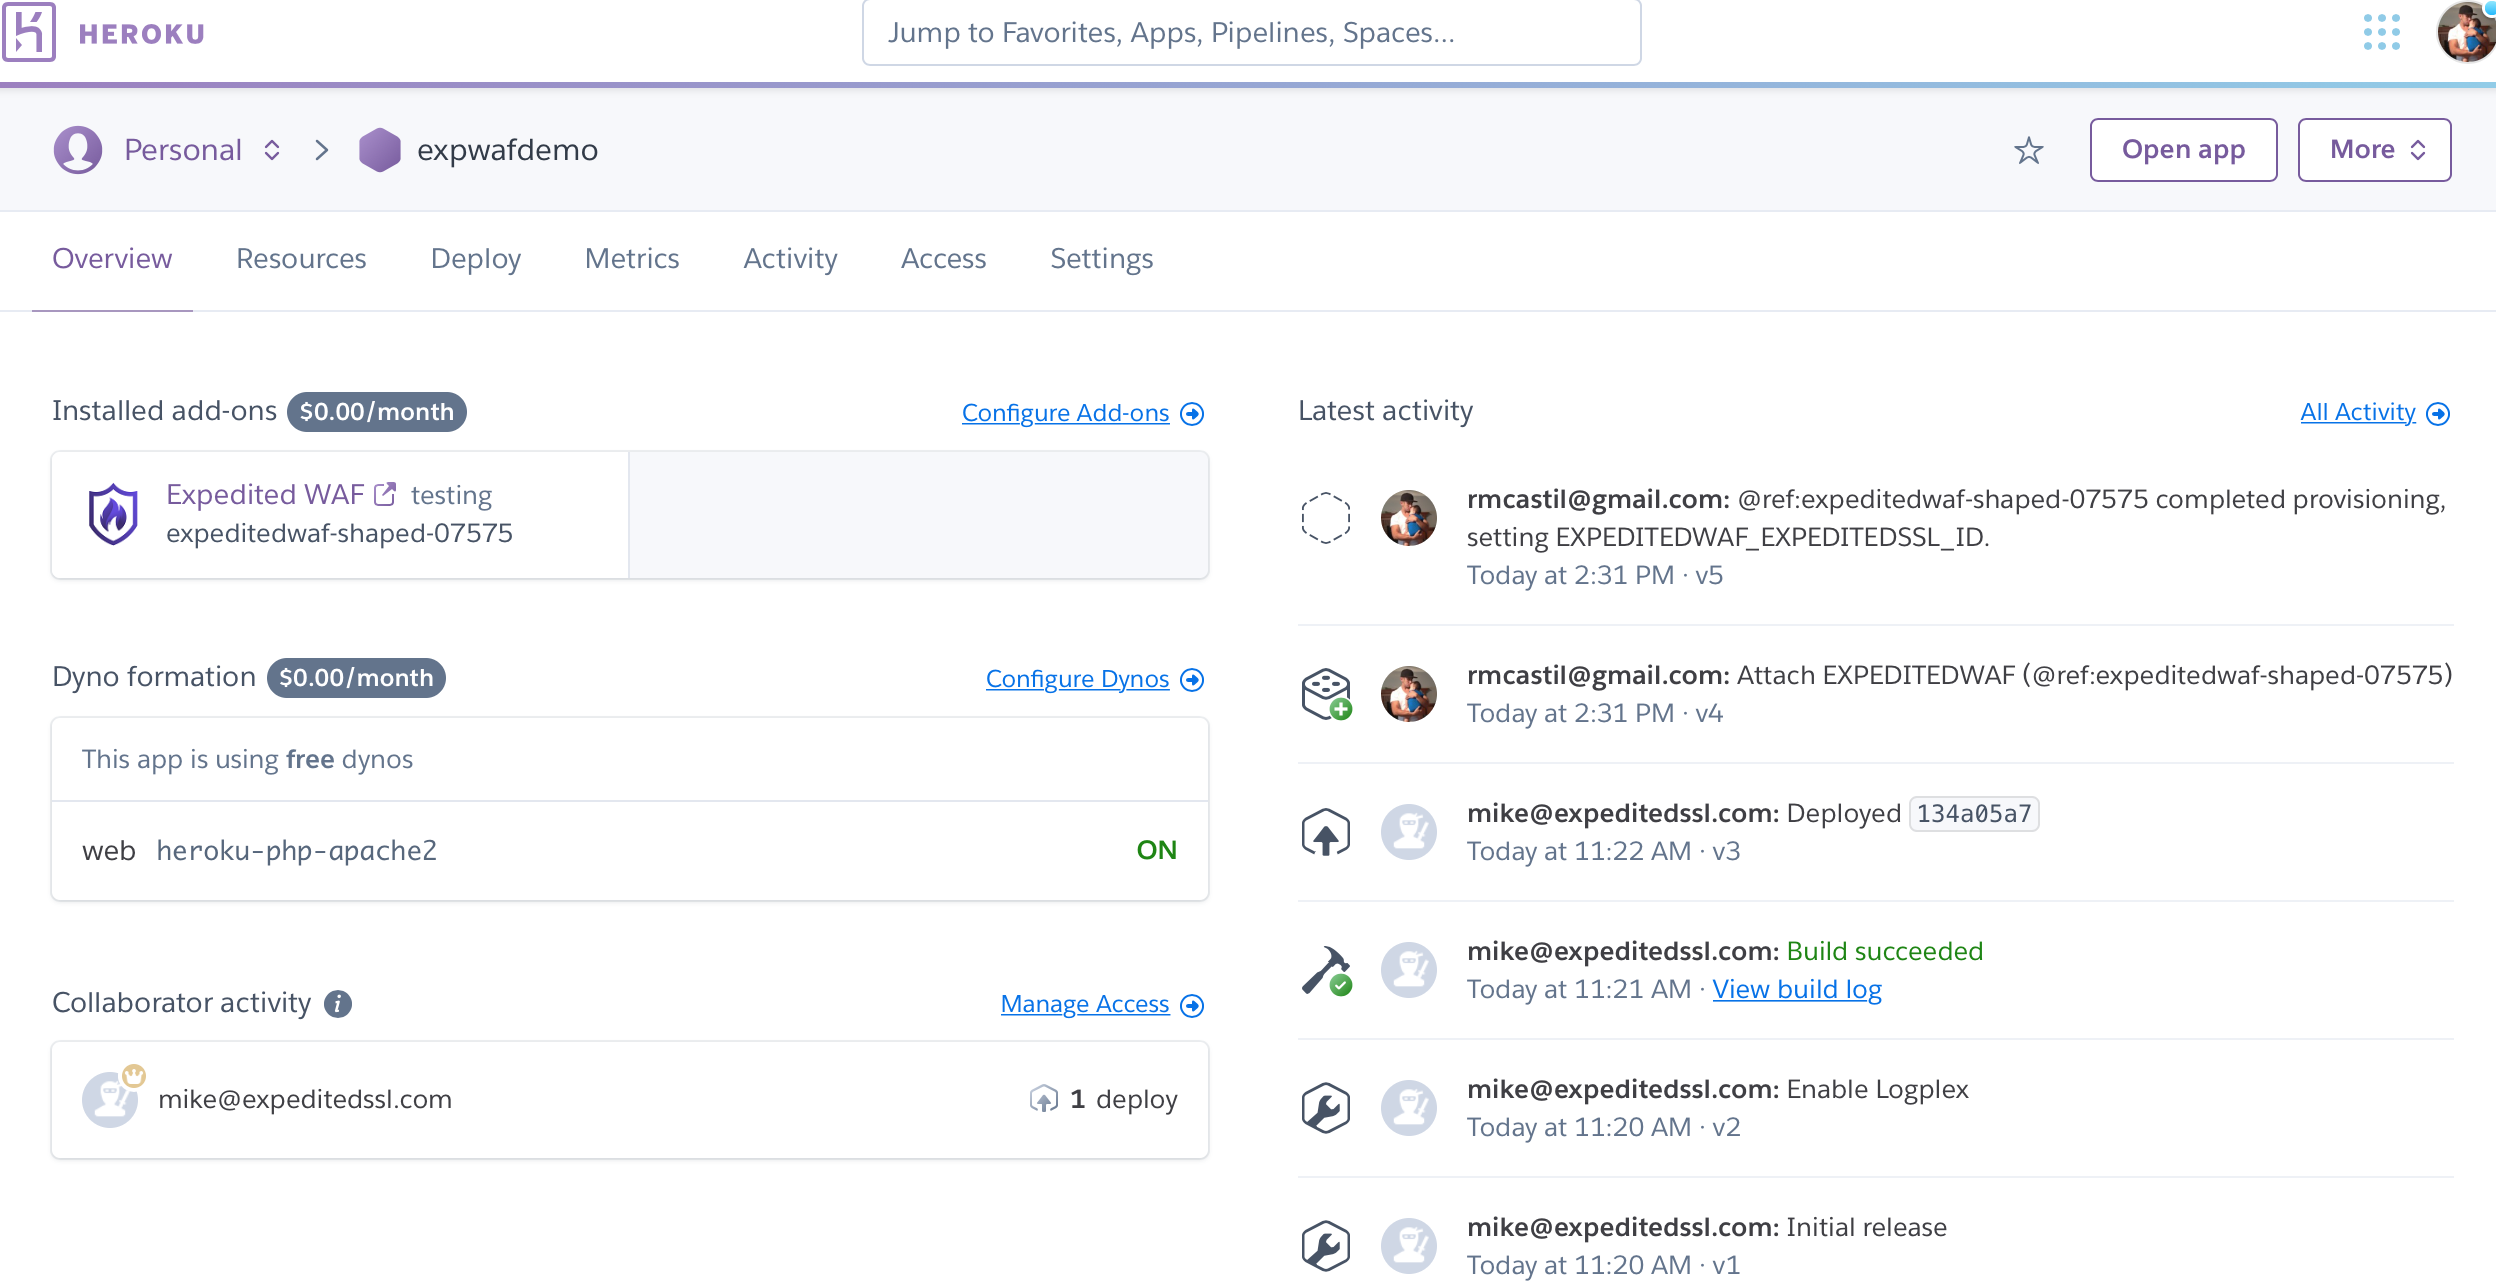
Once you've provisioned the add-on, you will be able to see Expedited WAF under your Installed add-ons.
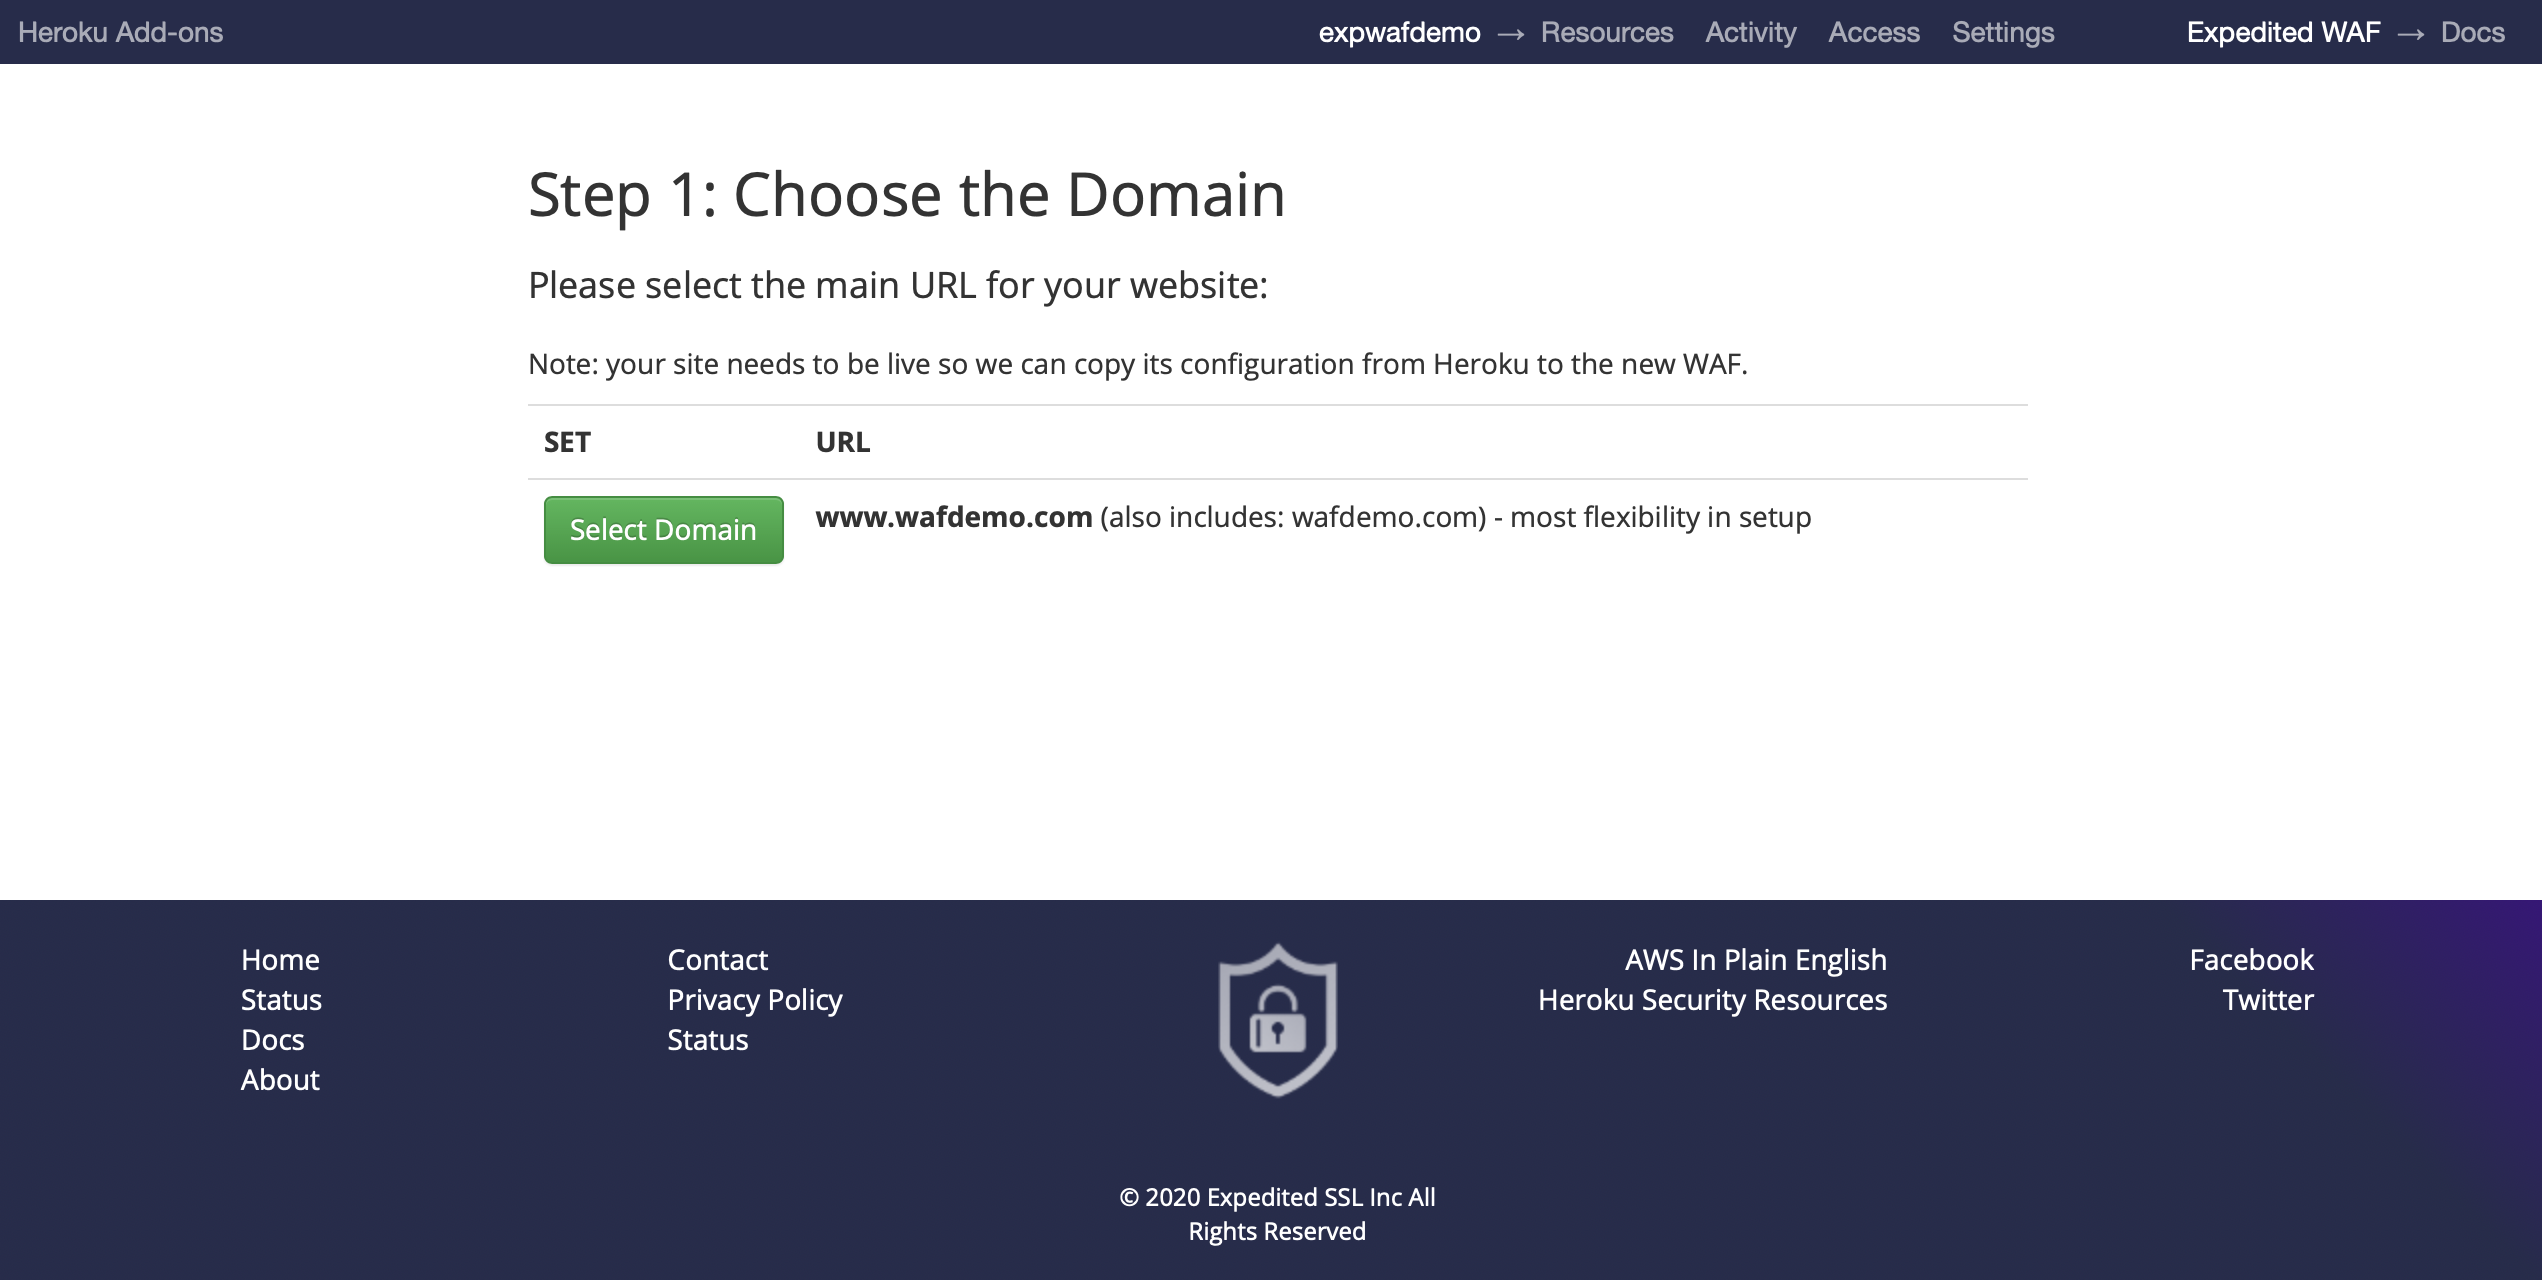
 Clicking
on the add-on will bring you to the Choose the Domain page. Once
here, you will be able to select which domain associated with your
Heroku application that you would like to protect with the WAF. Note
that an additional WAF has to be provisioned for every domain (though
multiple sub-domains of the same primary domain can be covered by a
wildcard).
Clicking
on the add-on will bring you to the Choose the Domain page. Once
here, you will be able to select which domain associated with your
Heroku application that you would like to protect with the WAF. Note
that an additional WAF has to be provisioned for every domain (though
multiple sub-domains of the same primary domain can be covered by a
wildcard).
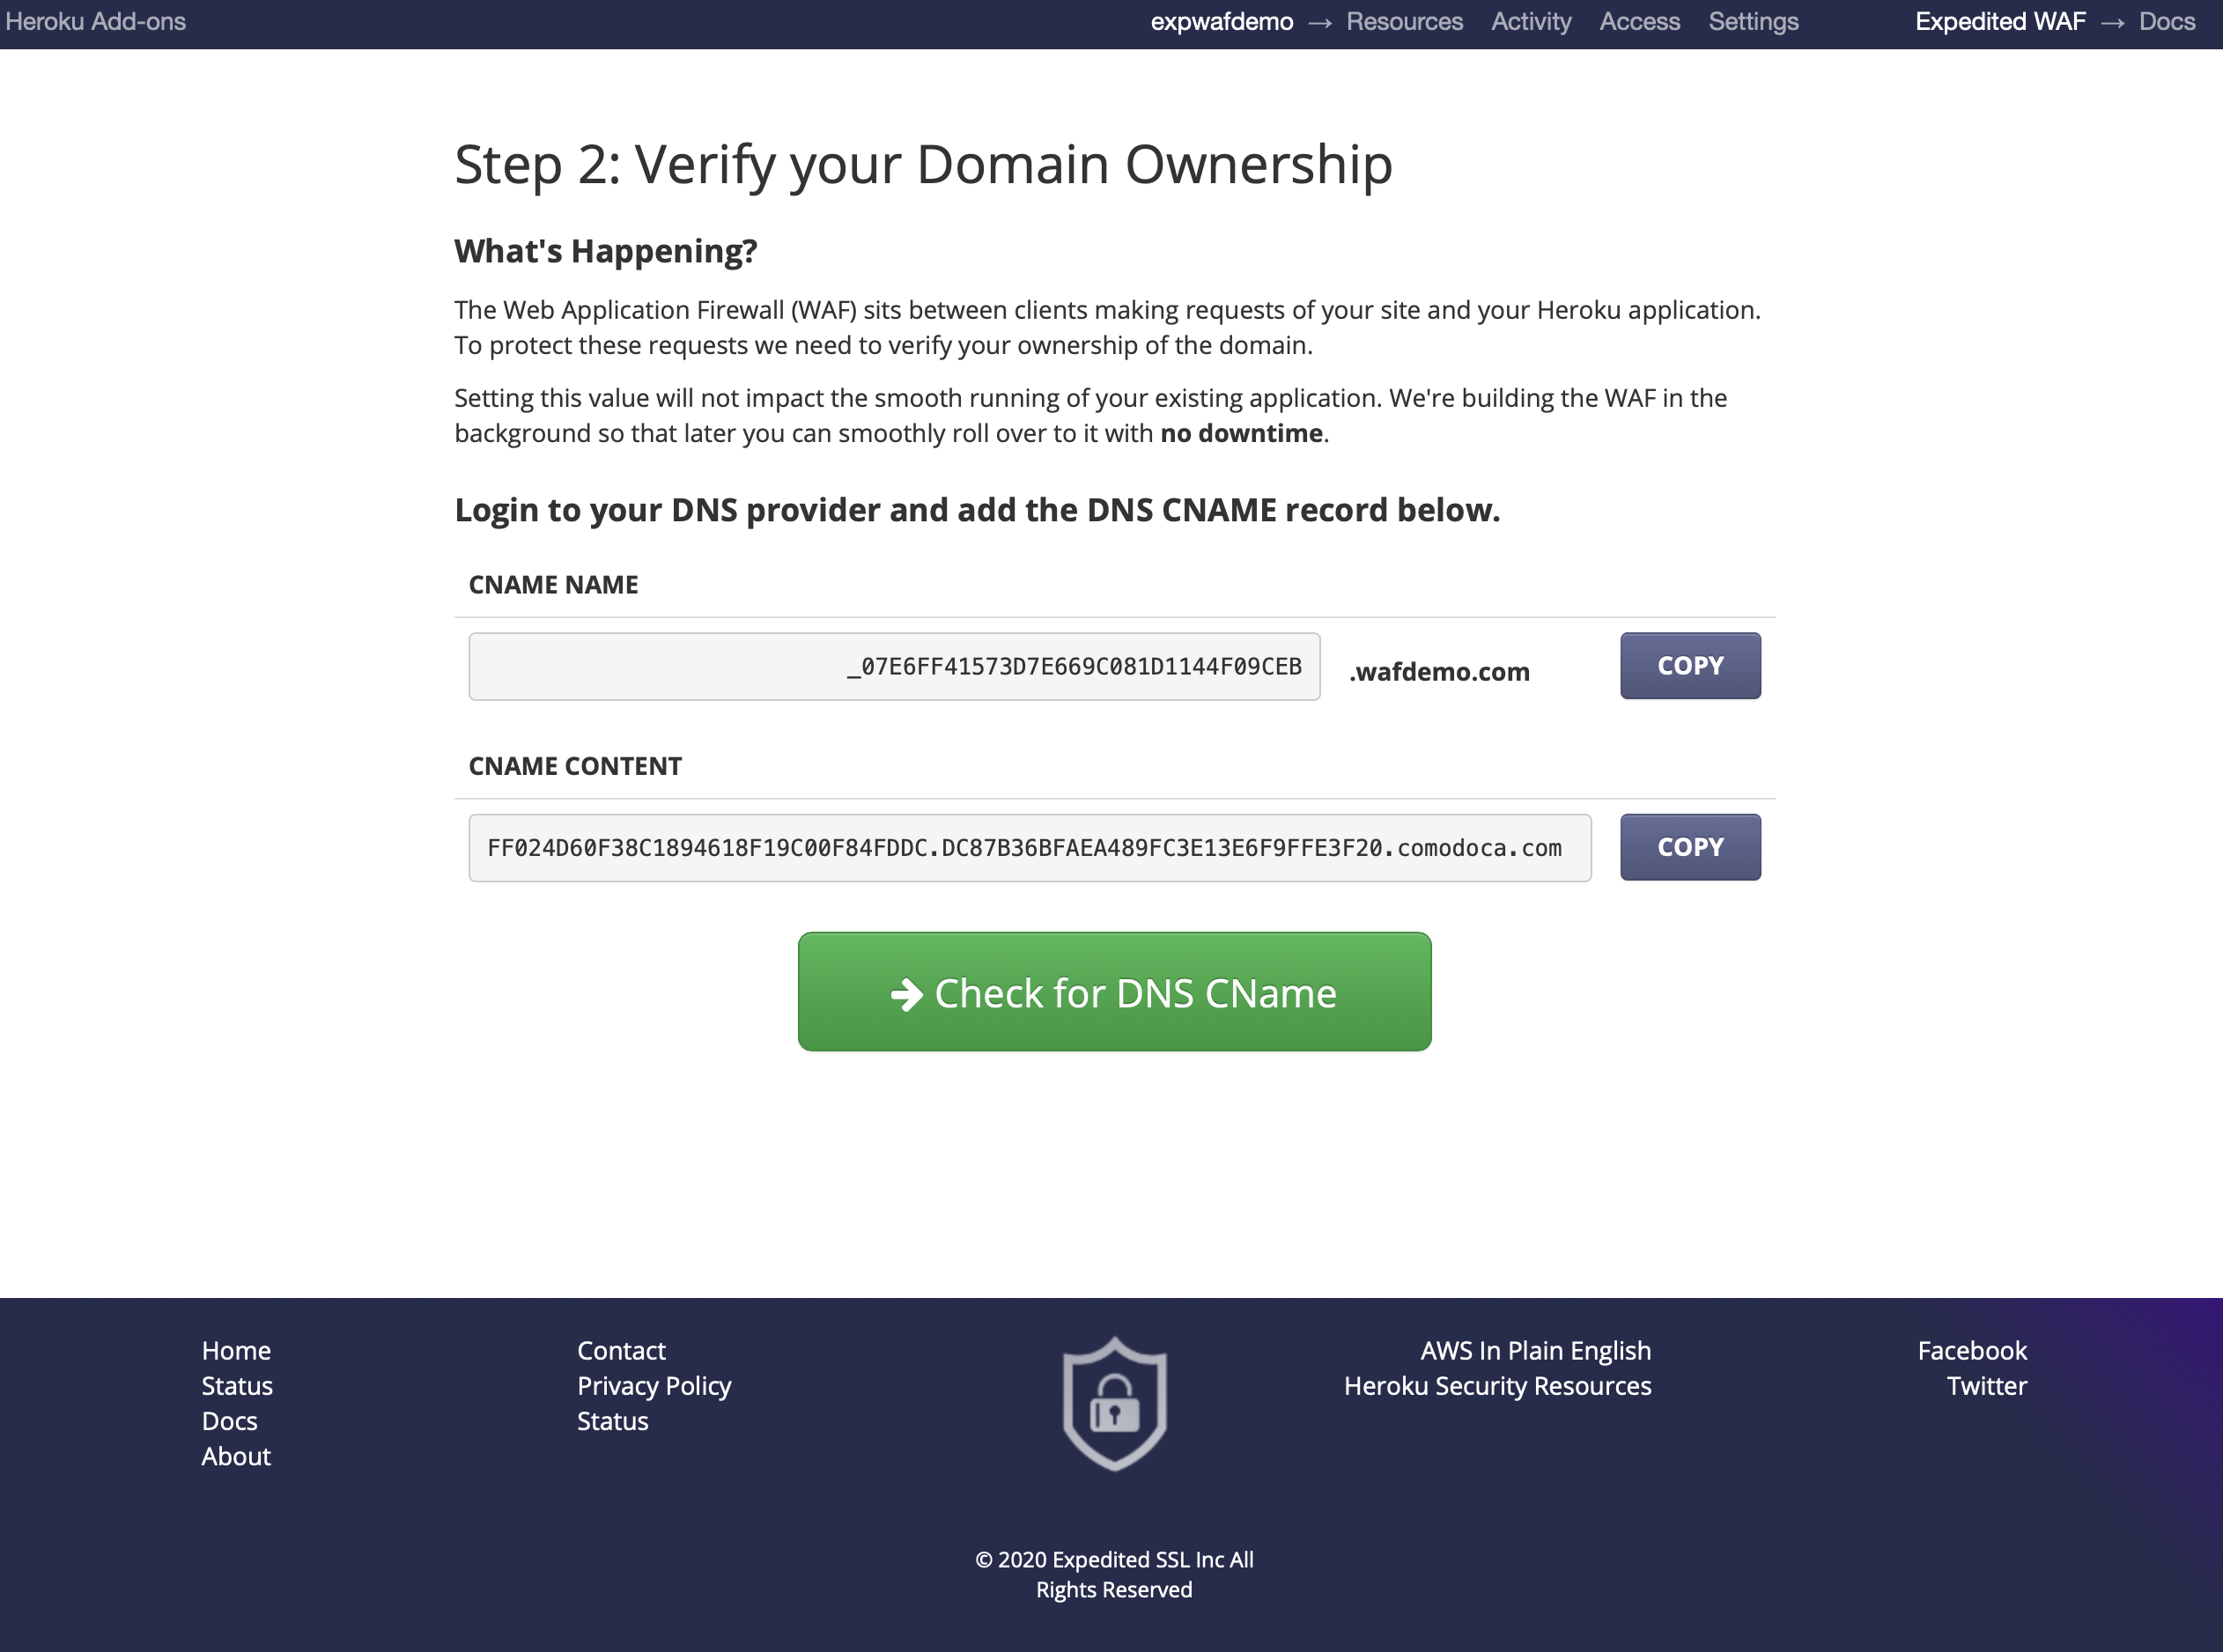
 After
selecting your domain, you will need to Verify your Domain
Ownership. This is done by modifying your DNS records.
After
selecting your domain, you will need to Verify your Domain
Ownership. This is done by modifying your DNS records.
Note: the domain verification DNS records do not change where your current traffic is routed.
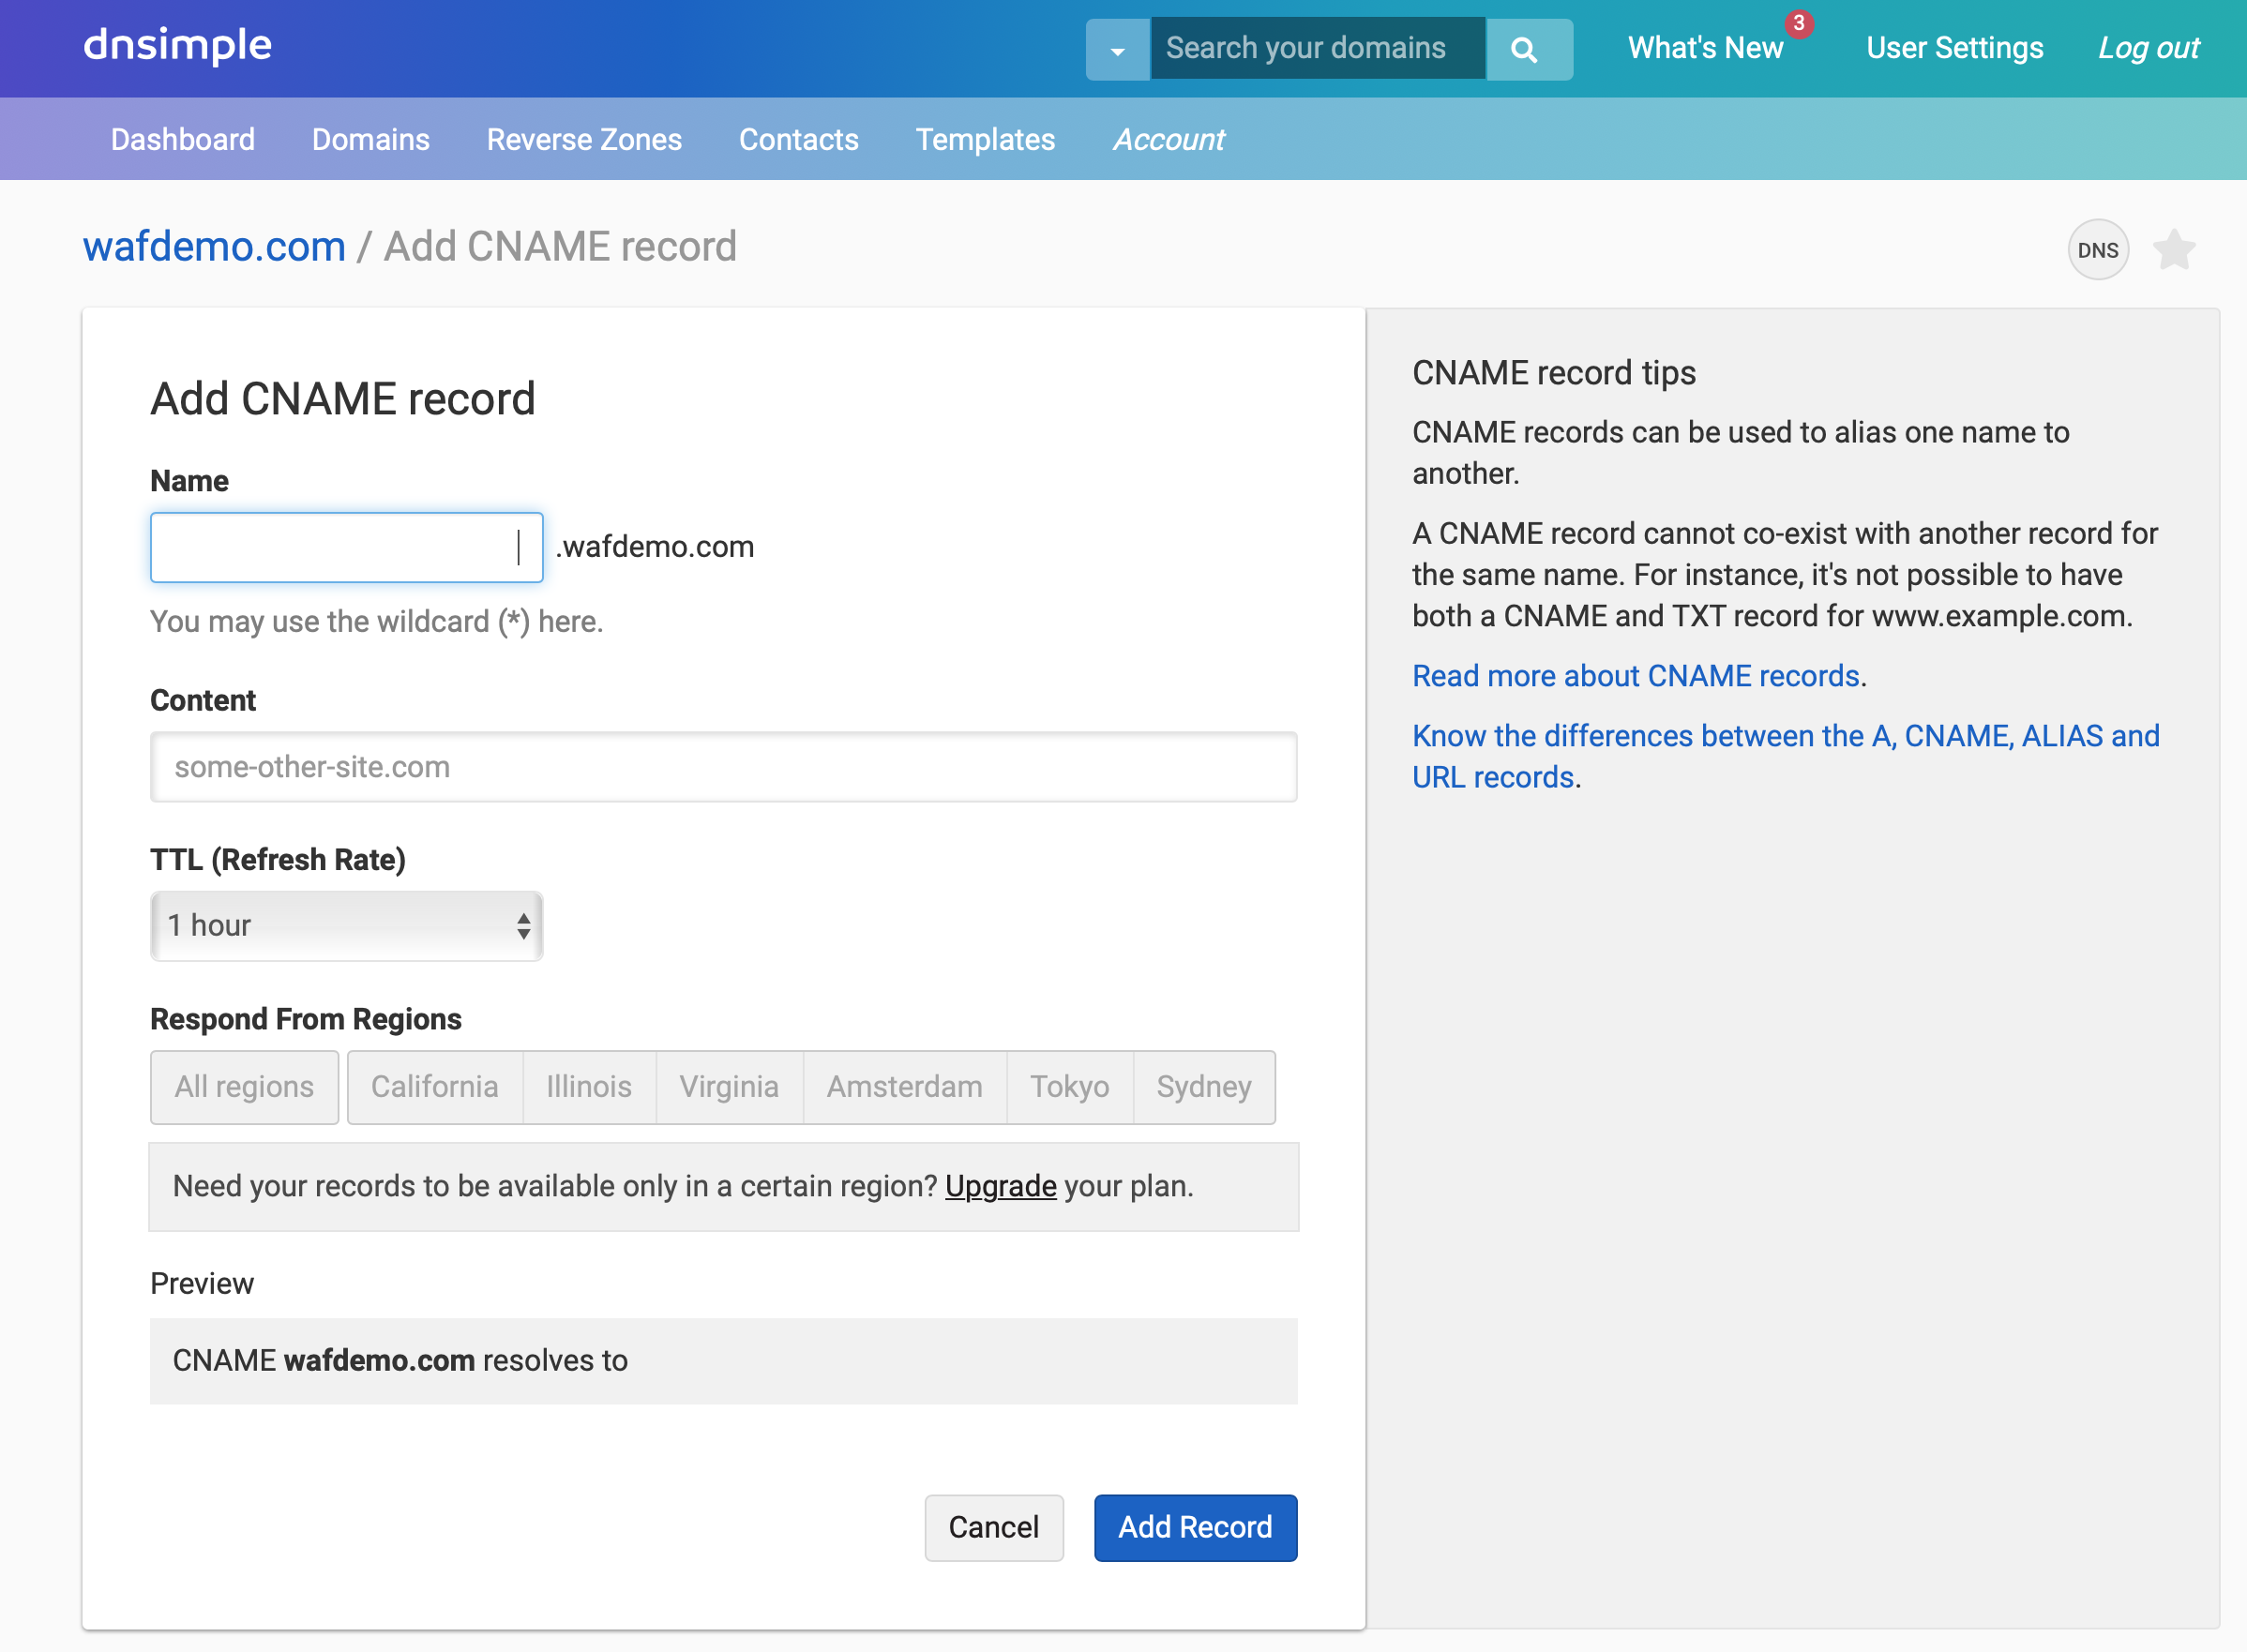
 In
this scenario, our DNS records for wafdemo.com are being managed via
DNSimple. We're going to add a CNAME record using the values provided
in the Verify your Domain Ownership step to prove that we are the
rightful owners of the www.wafdemo.com domain.
In
this scenario, our DNS records for wafdemo.com are being managed via
DNSimple. We're going to add a CNAME record using the values provided
in the Verify your Domain Ownership step to prove that we are the
rightful owners of the www.wafdemo.com domain.
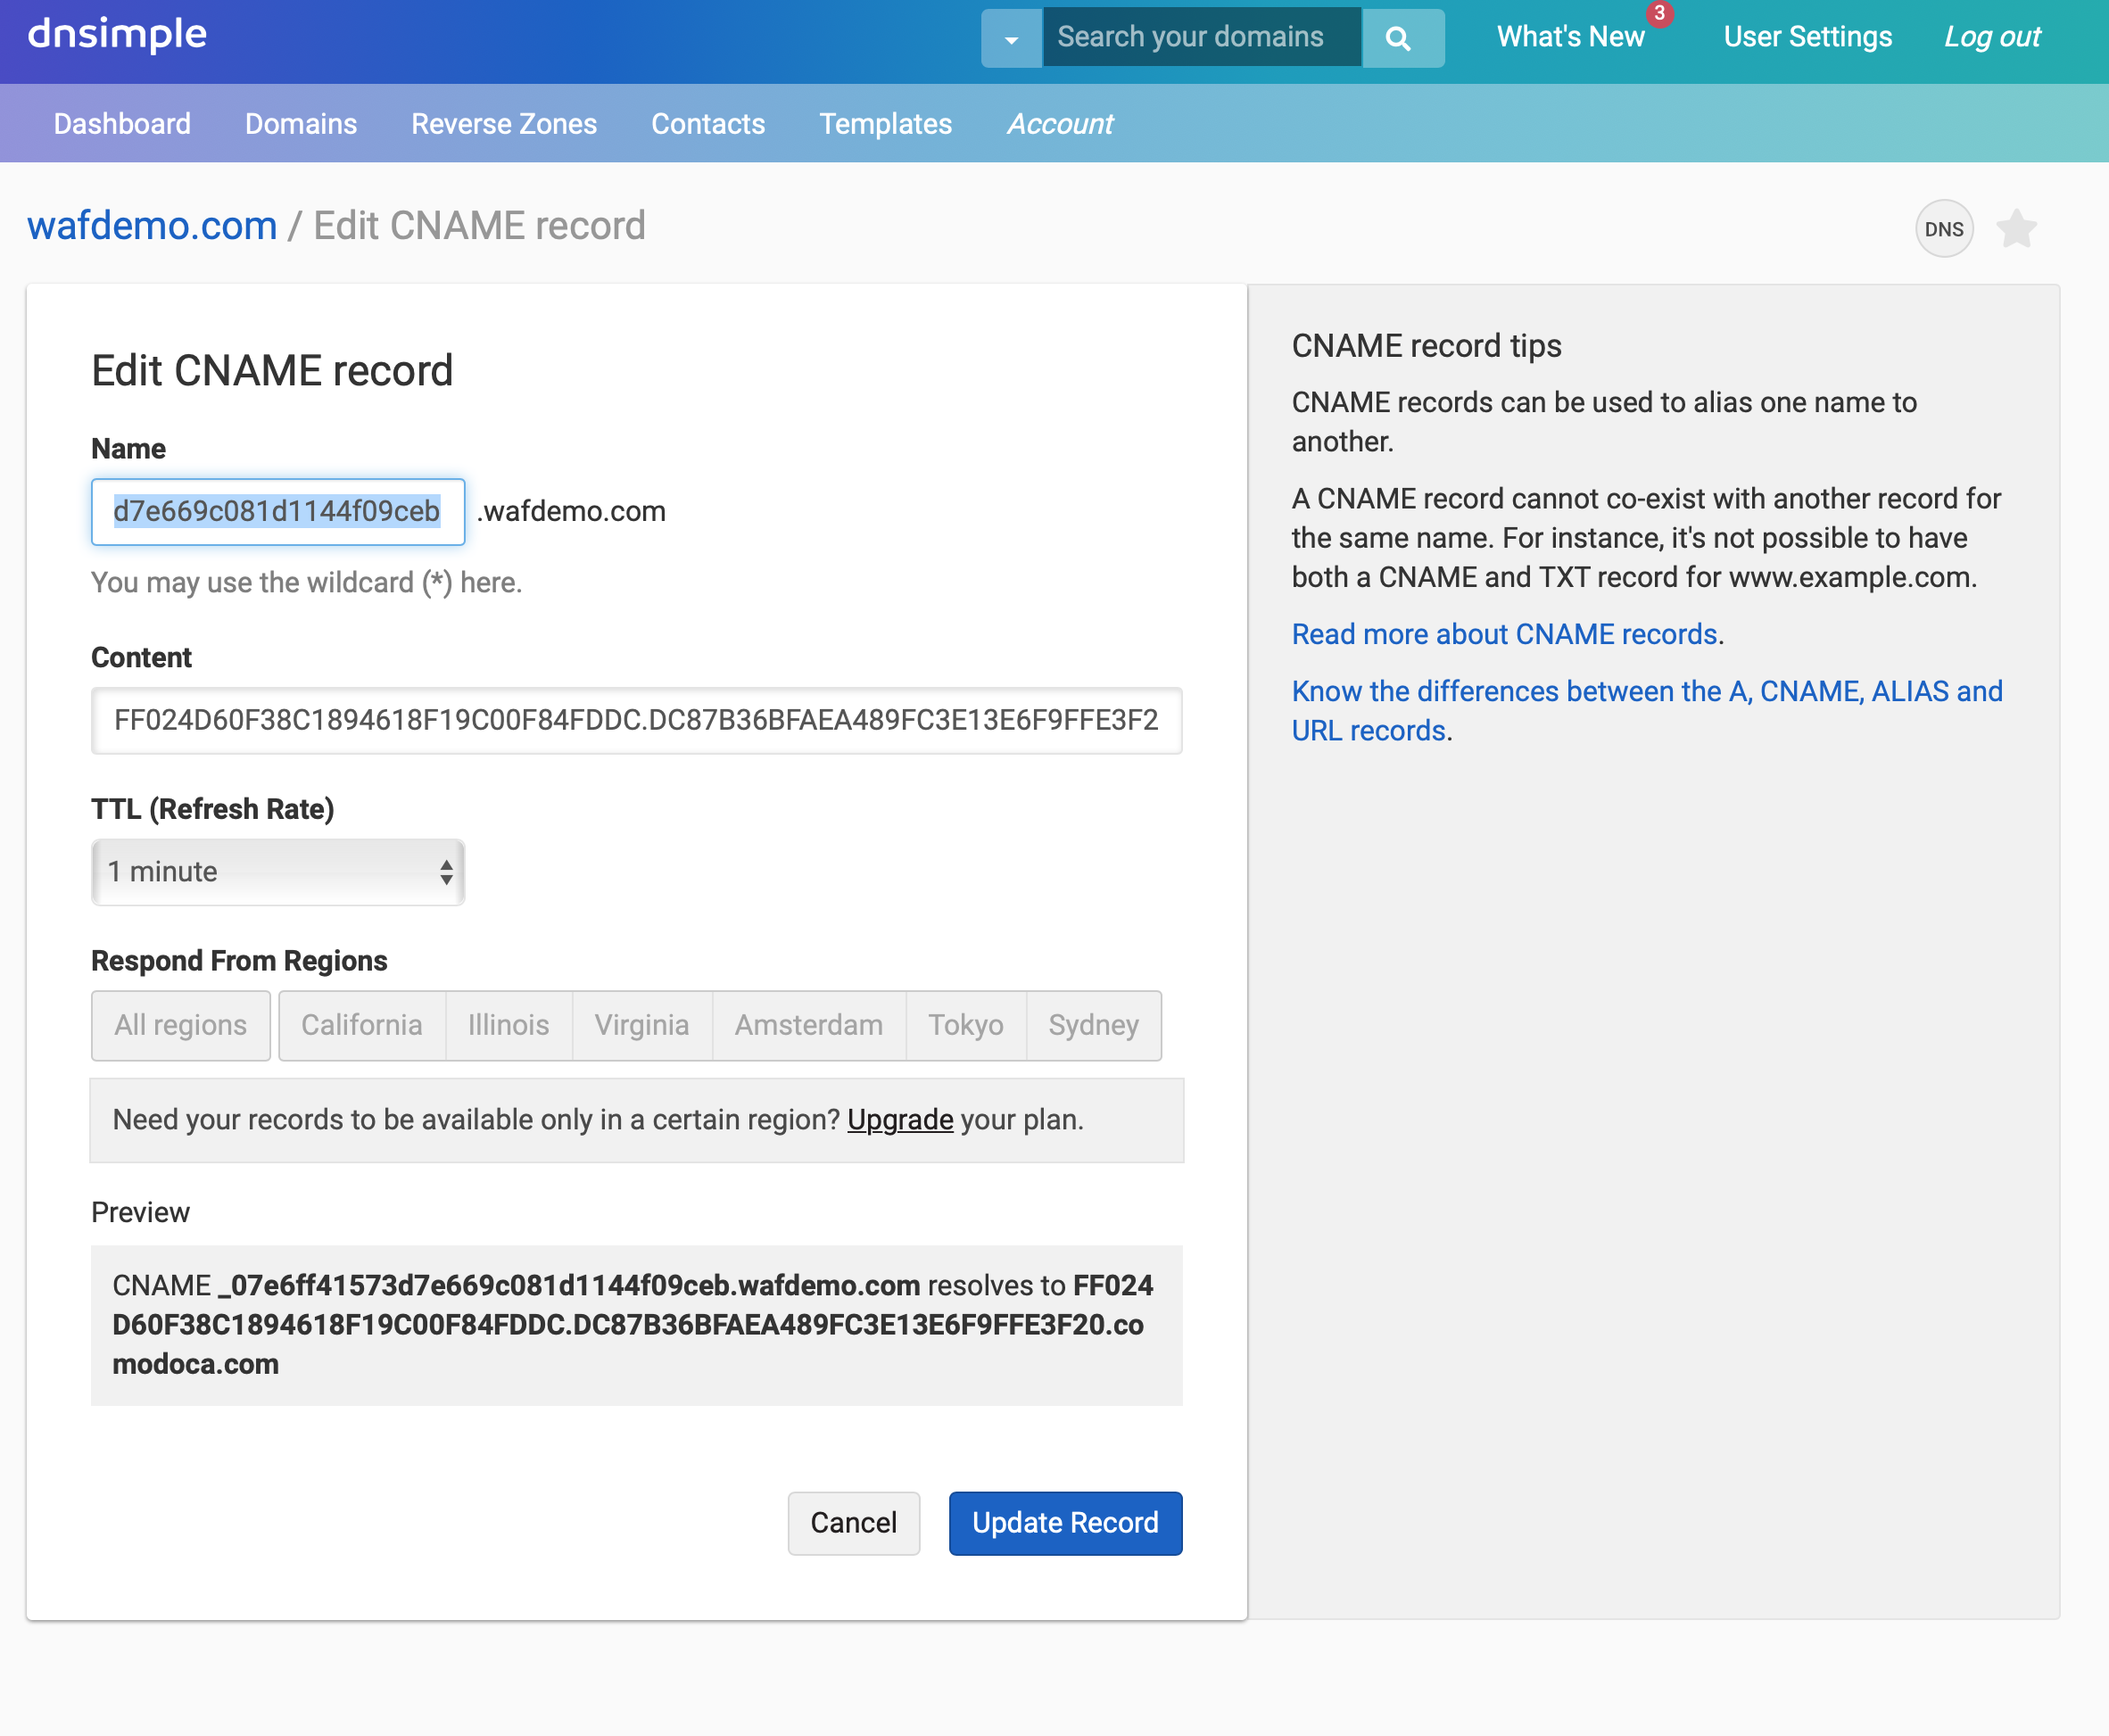 Once
the record has been added, return to the Verify Domain Ownership
page. You have the option to click the Check for DNS
CName button or to wait for the page to update automatically.
The page should update within a few minutes of adding the CNAME
record.
Once
the record has been added, return to the Verify Domain Ownership
page. You have the option to click the Check for DNS
CName button or to wait for the page to update automatically.
The page should update within a few minutes of adding the CNAME
record.
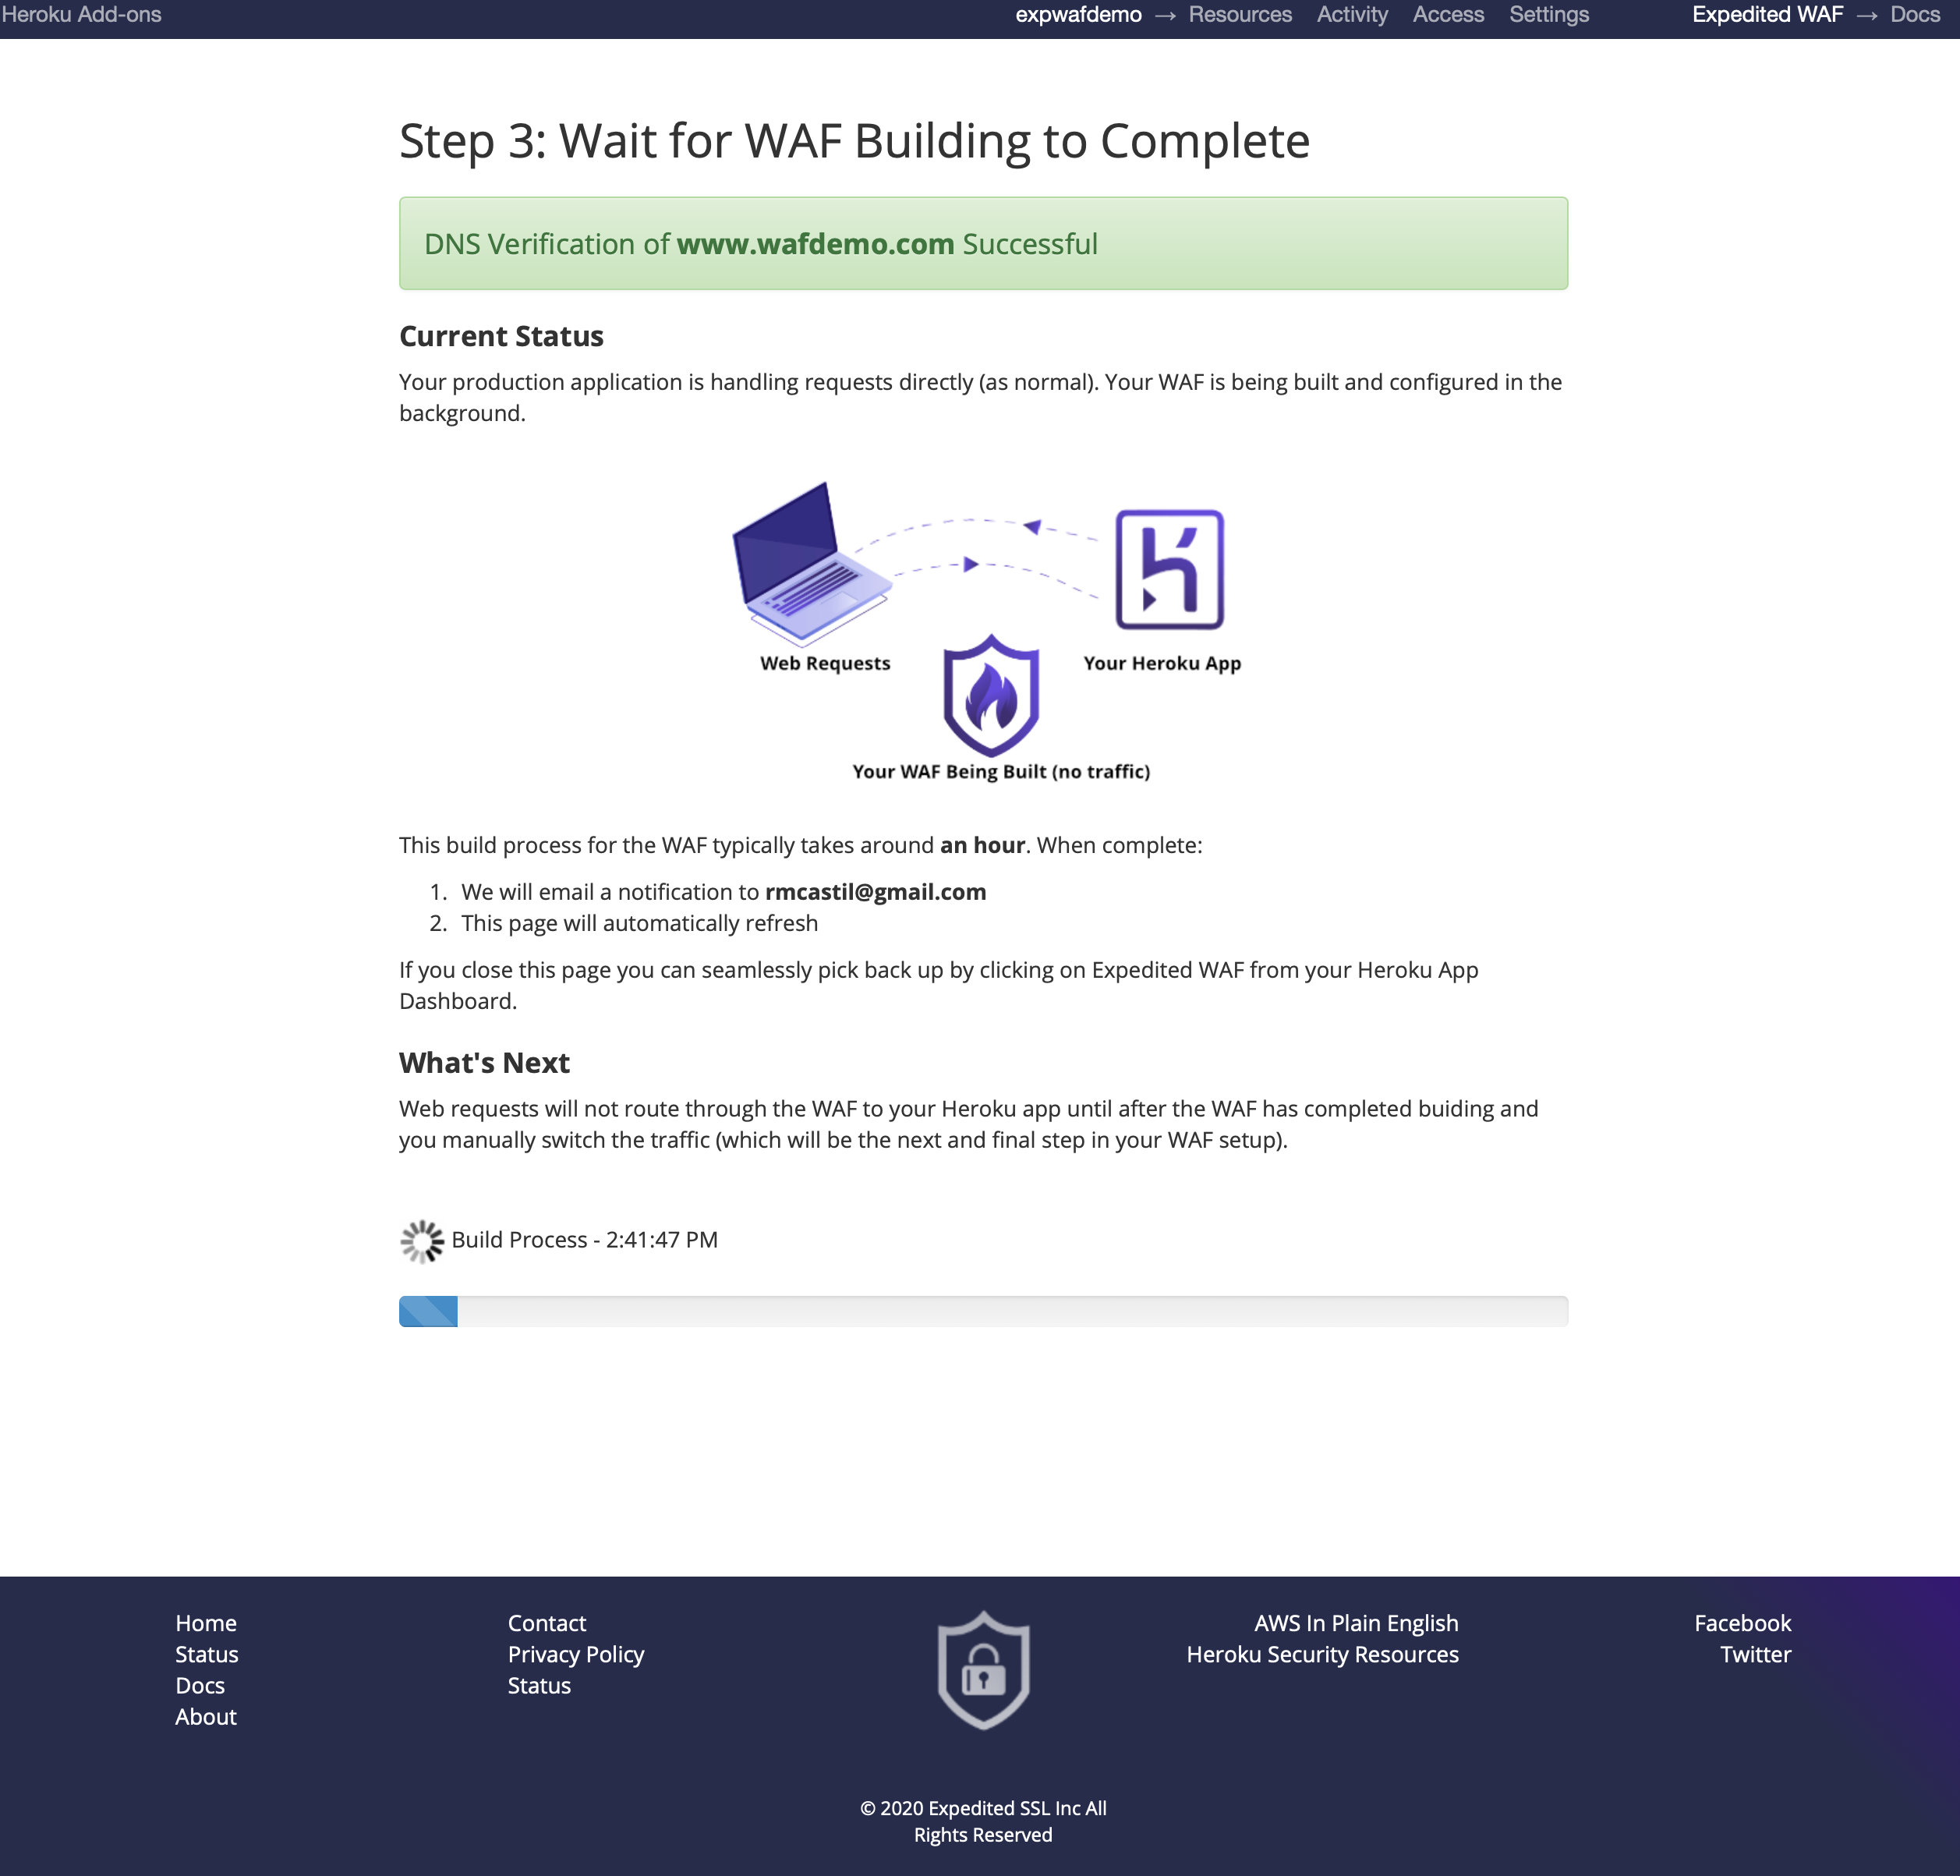
Once the CNAME record you added is detected you will see the following page as the WAF starts to build. This process typically takes between ten to twenty minutes to complete.
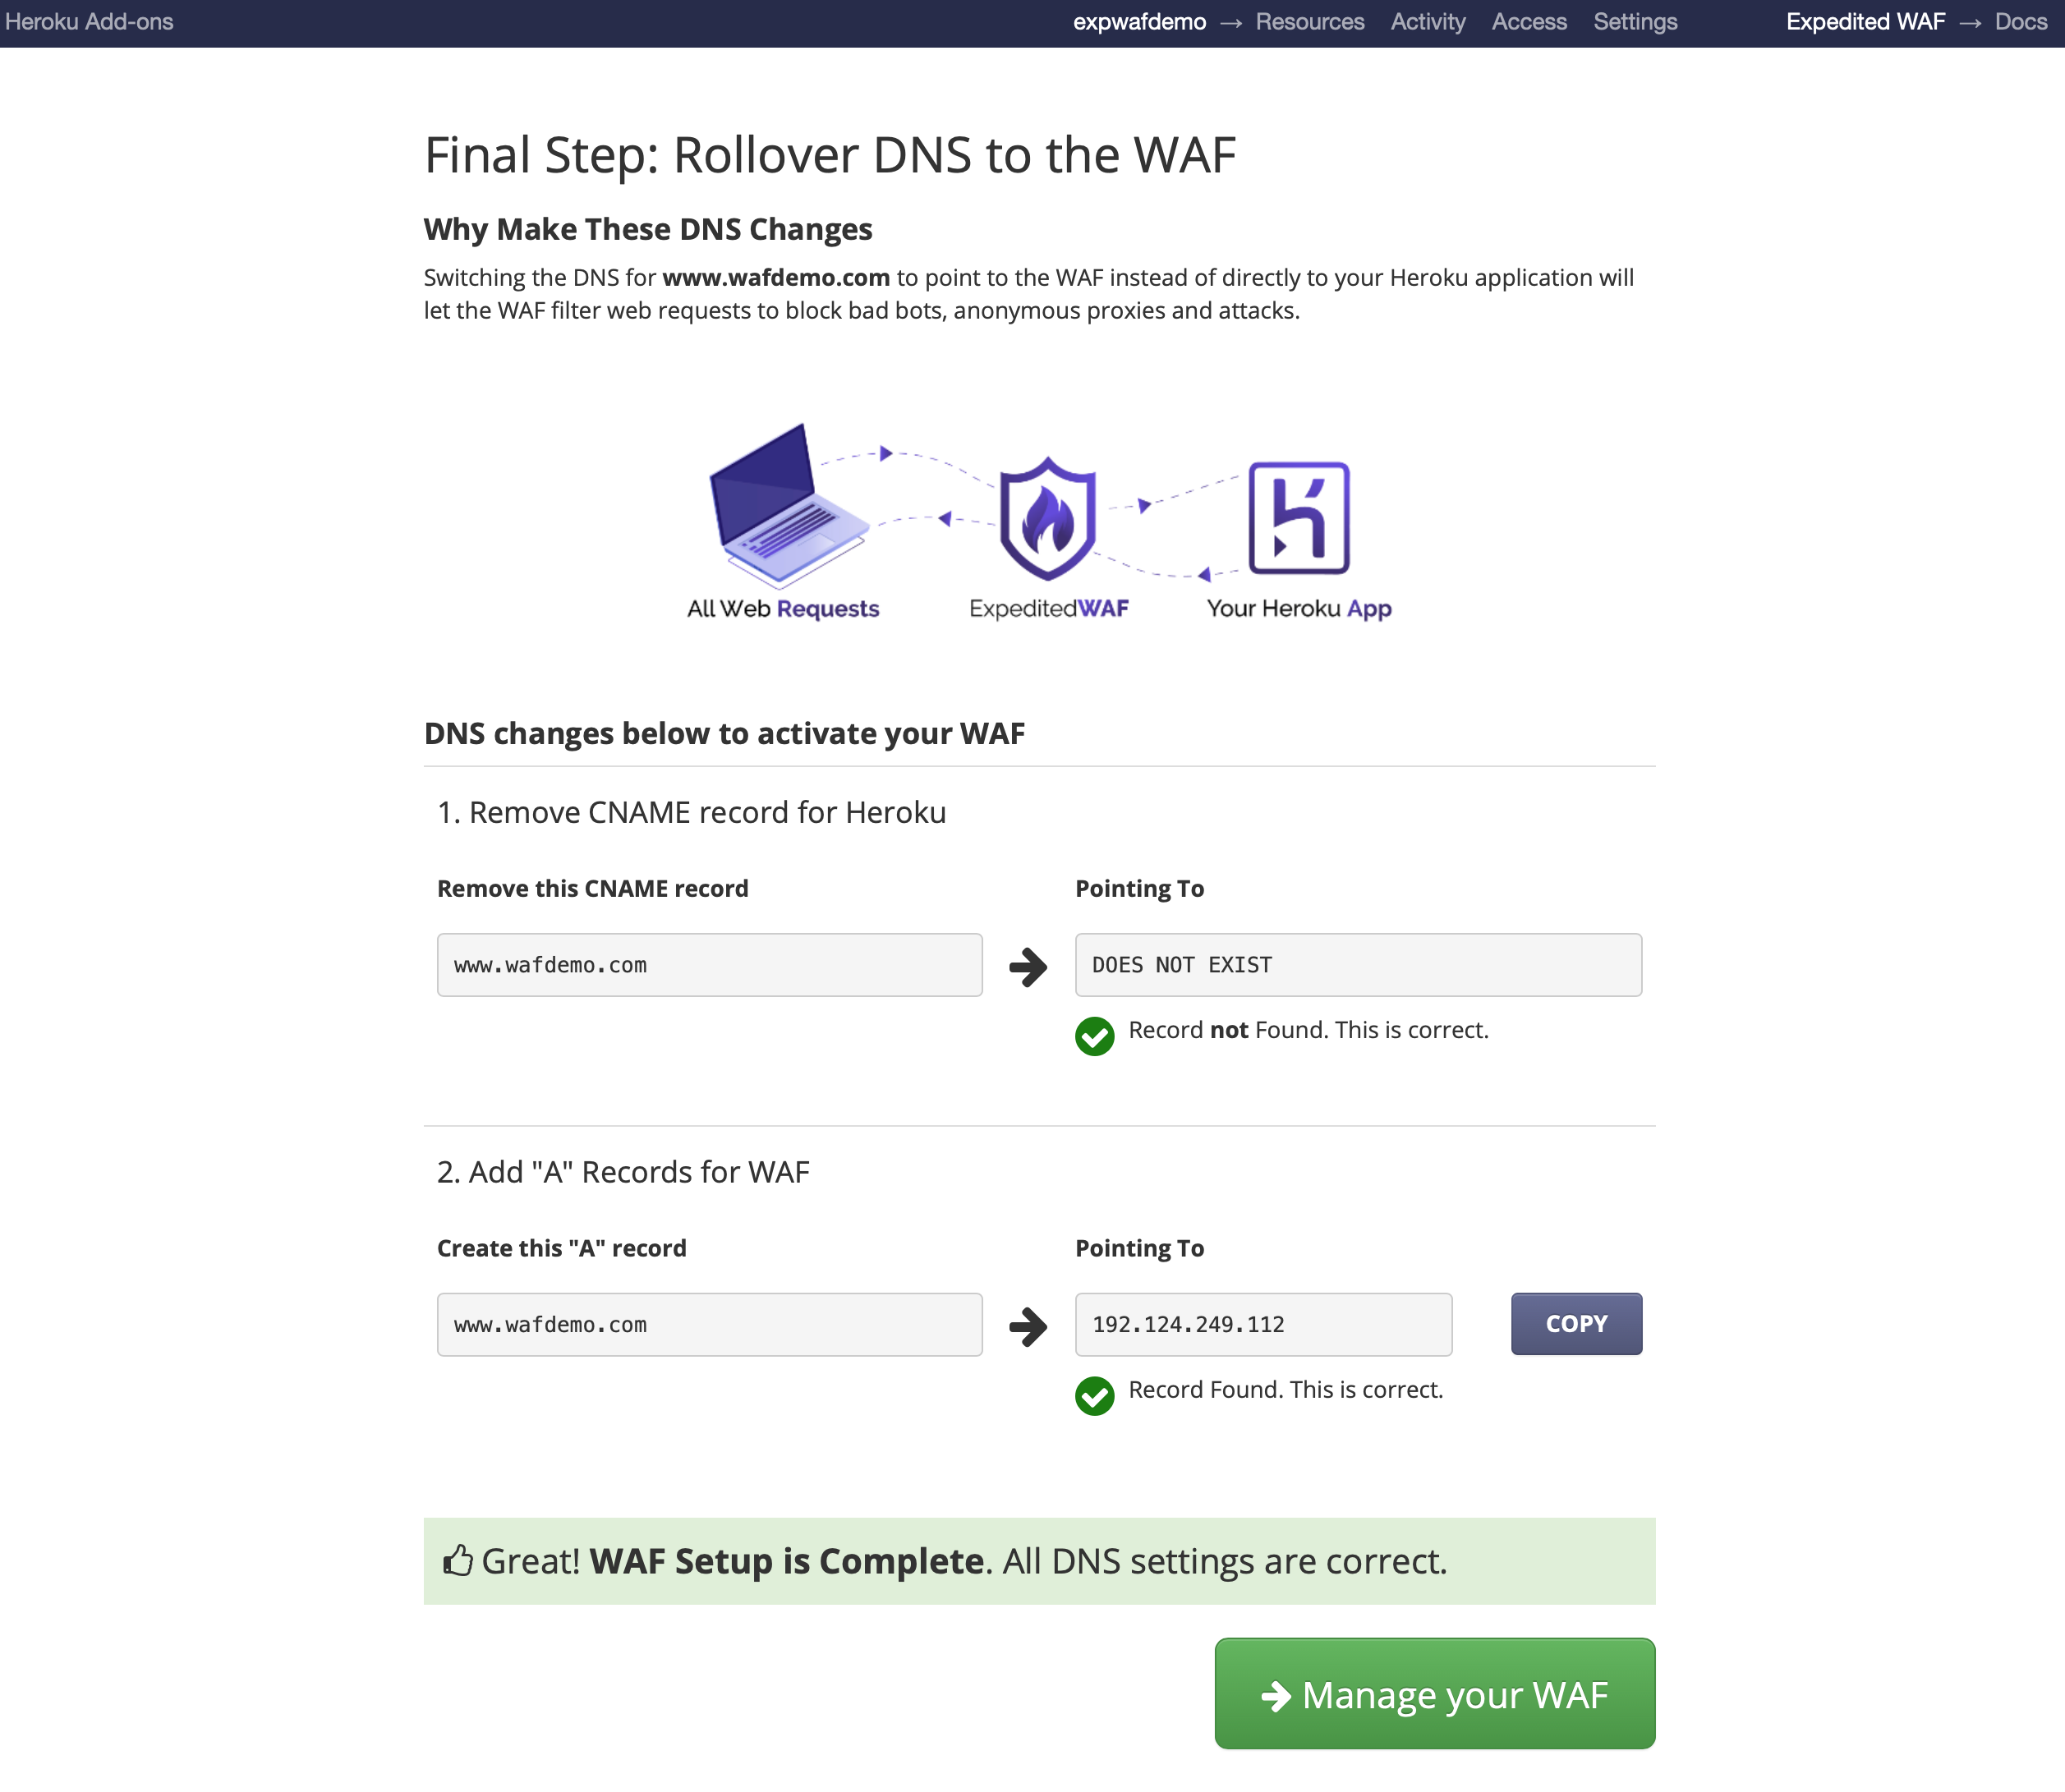
 Once
the WAF has been built you will need to rollover your DNS records to
point to the WAF. Following these instructions will bring your WAF
online with no perceptible downtime for uses of your site.
Once
the WAF has been built you will need to rollover your DNS records to
point to the WAF. Following these instructions will bring your WAF
online with no perceptible downtime for uses of your site.
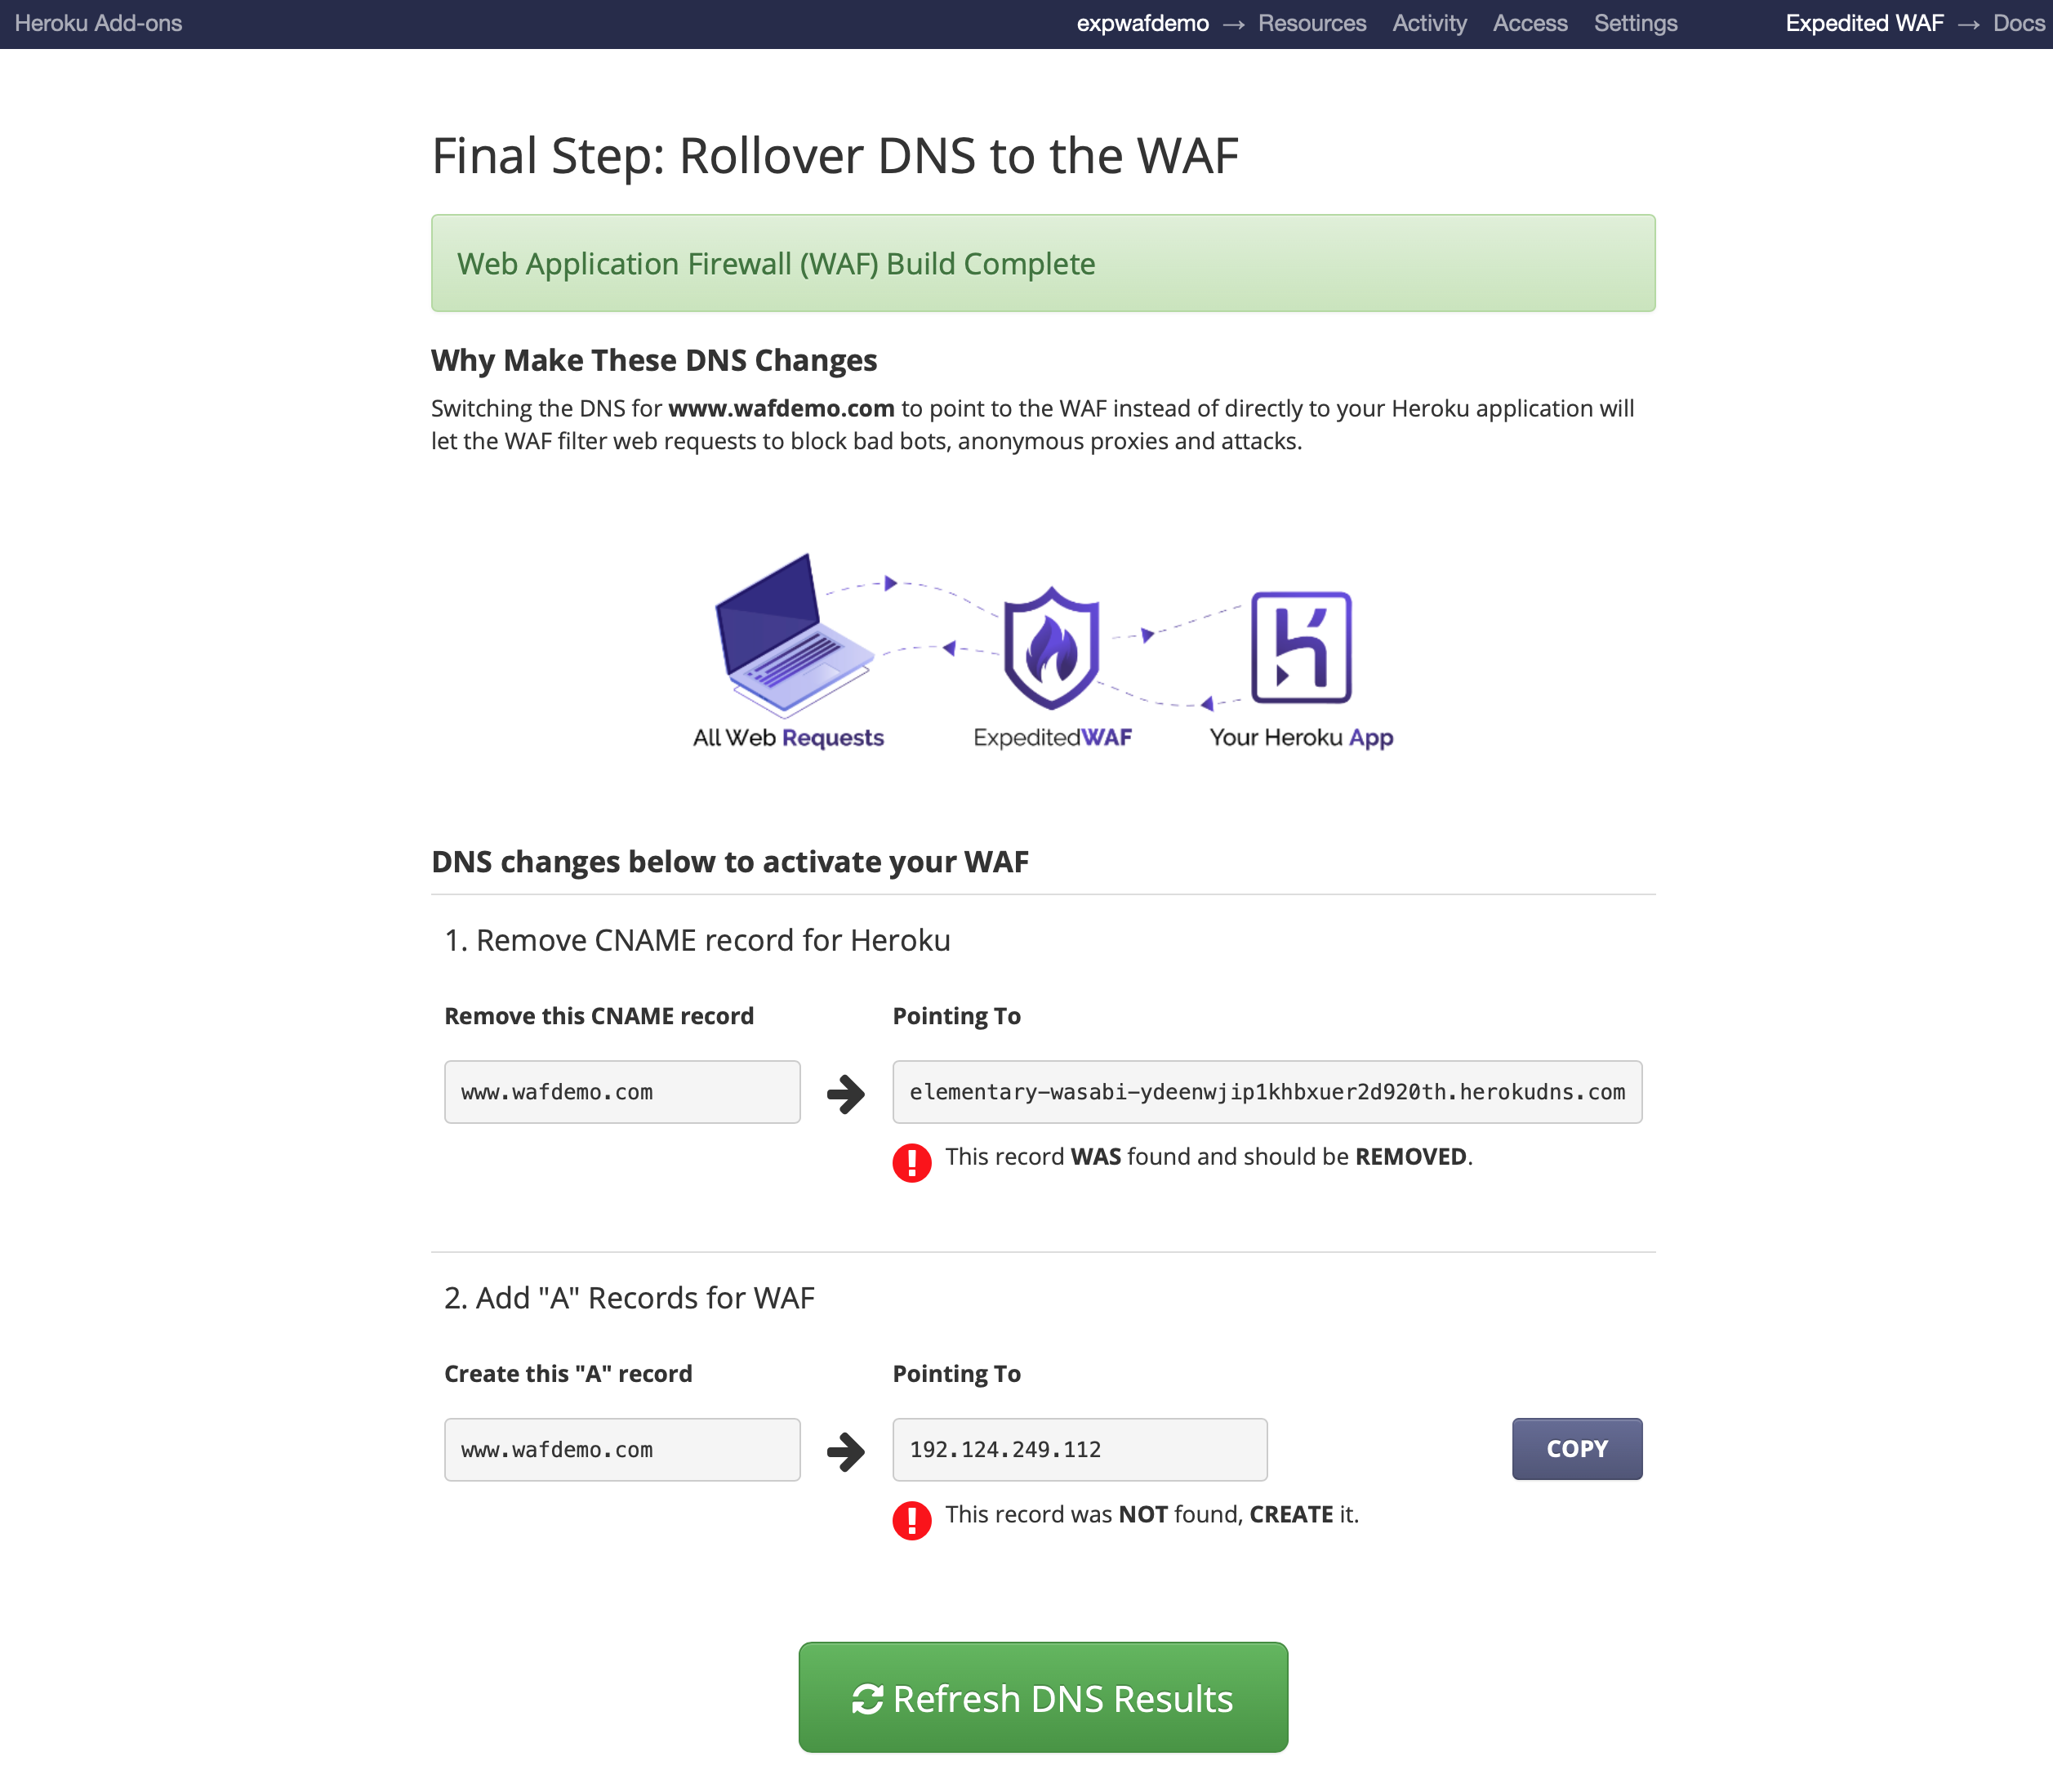 To
point your DNS record to the WAF you will first delete the original
CNAME record pointing to your Heroku instance.
To
point your DNS record to the WAF you will first delete the original
CNAME record pointing to your Heroku instance.
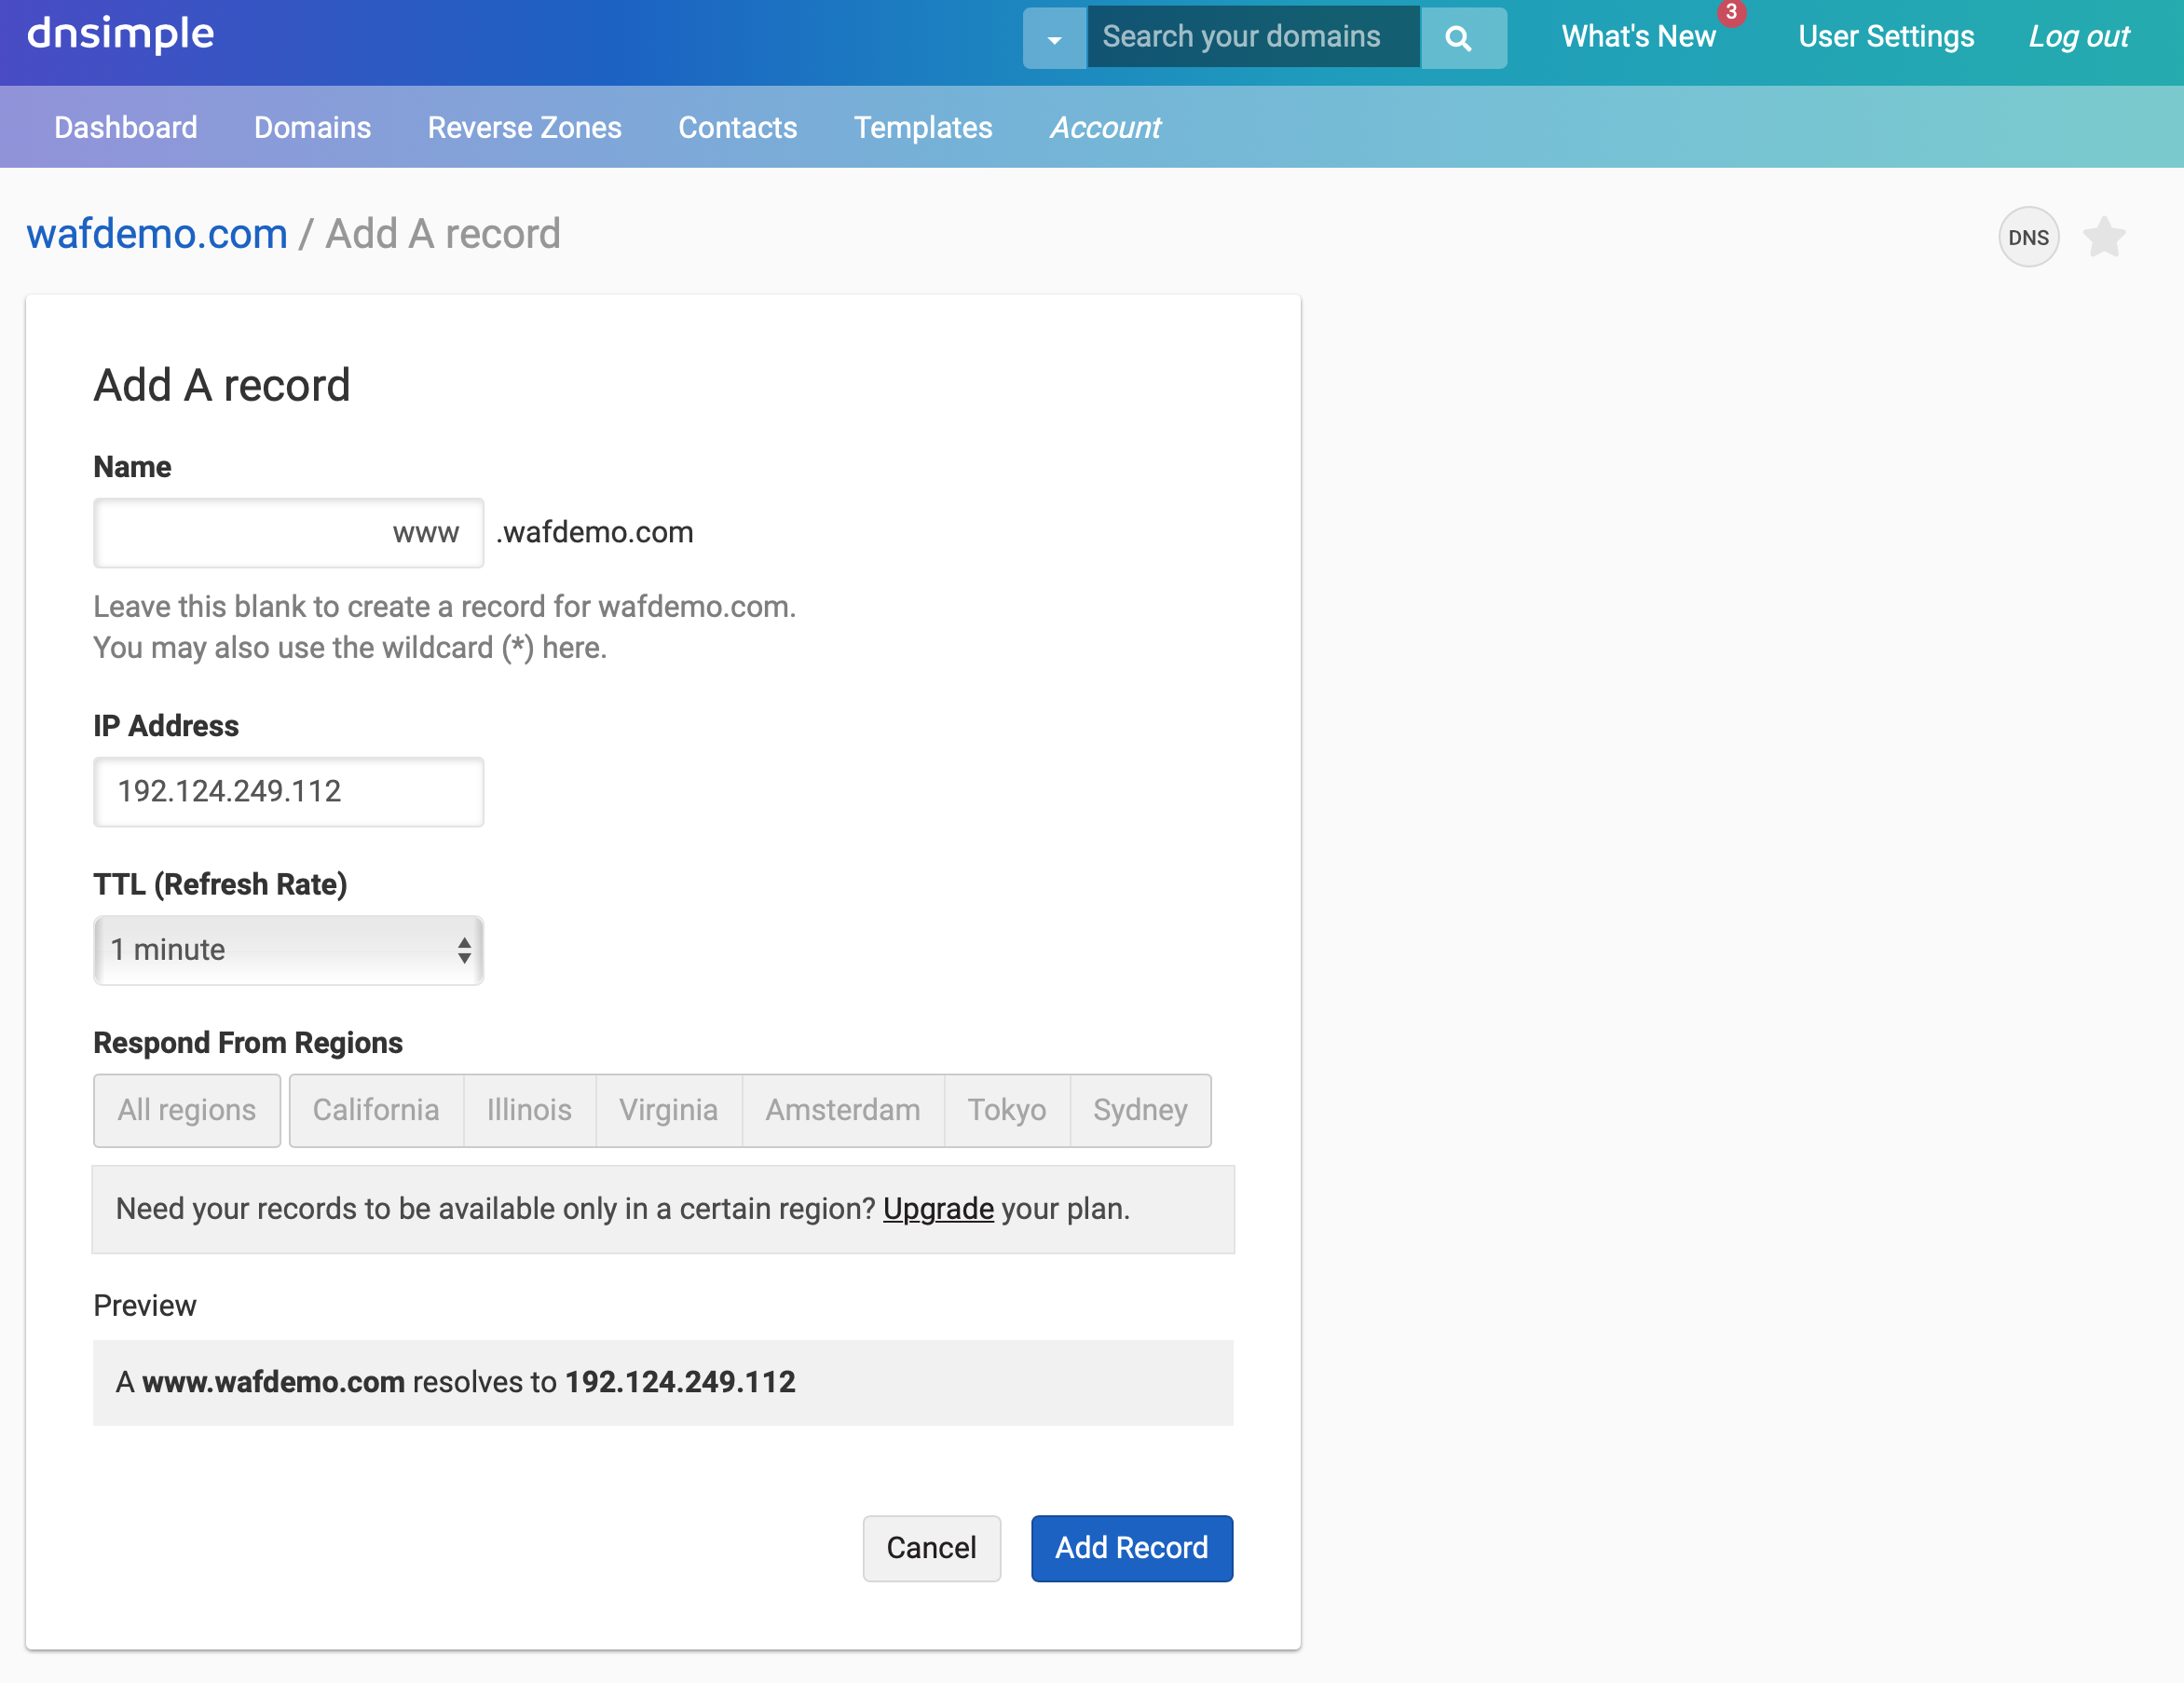
 Next,
add an A record that will point to the WAF IP.
Next,
add an A record that will point to the WAF IP.
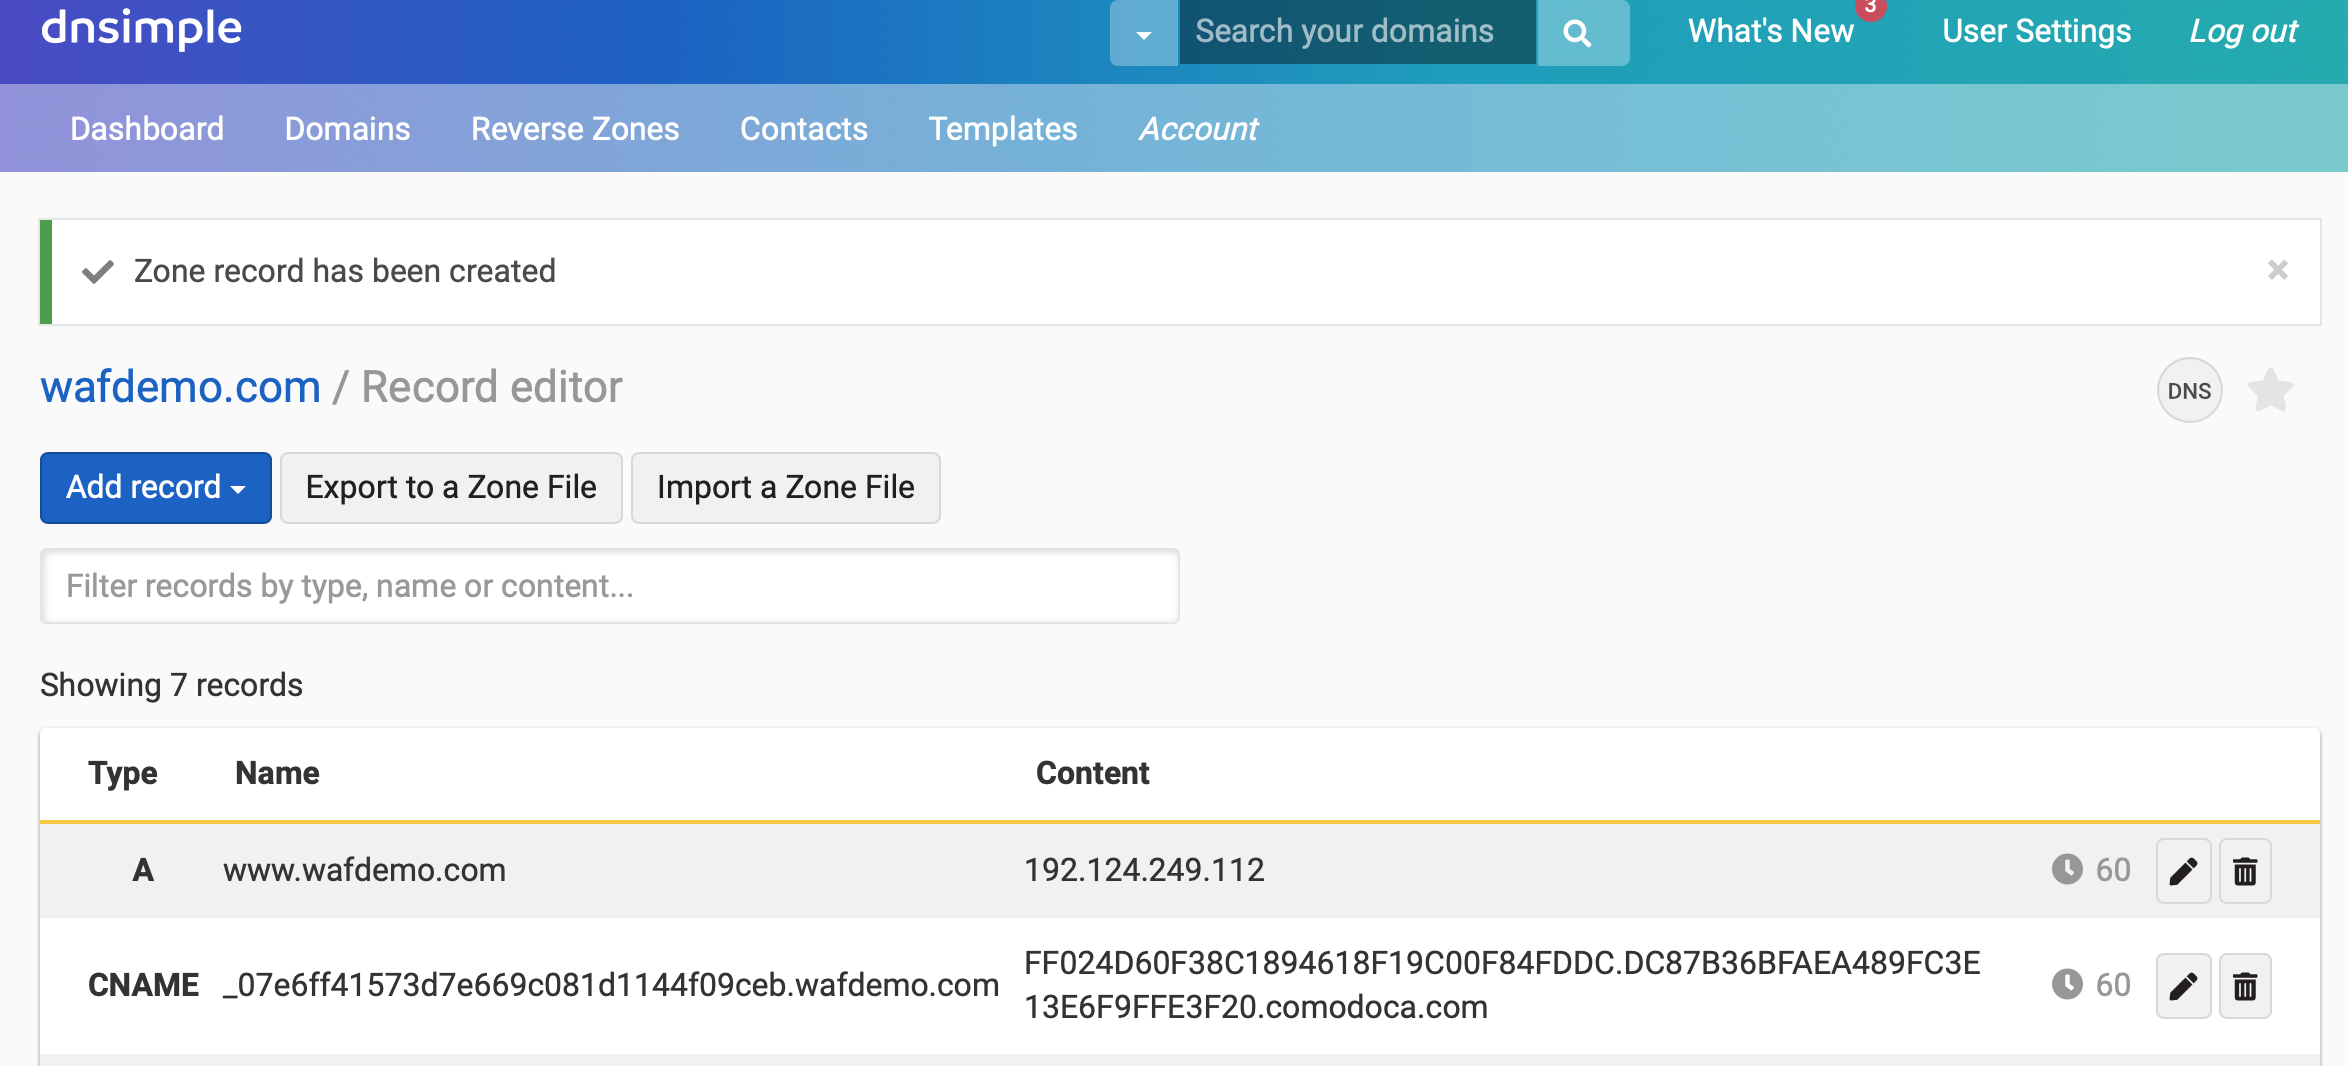 After
the new A record has been created, you can click on the Refresh
DNS Results button to confirm everything is working properly.
After
the new A record has been created, you can click on the Refresh
DNS Results button to confirm everything is working properly.
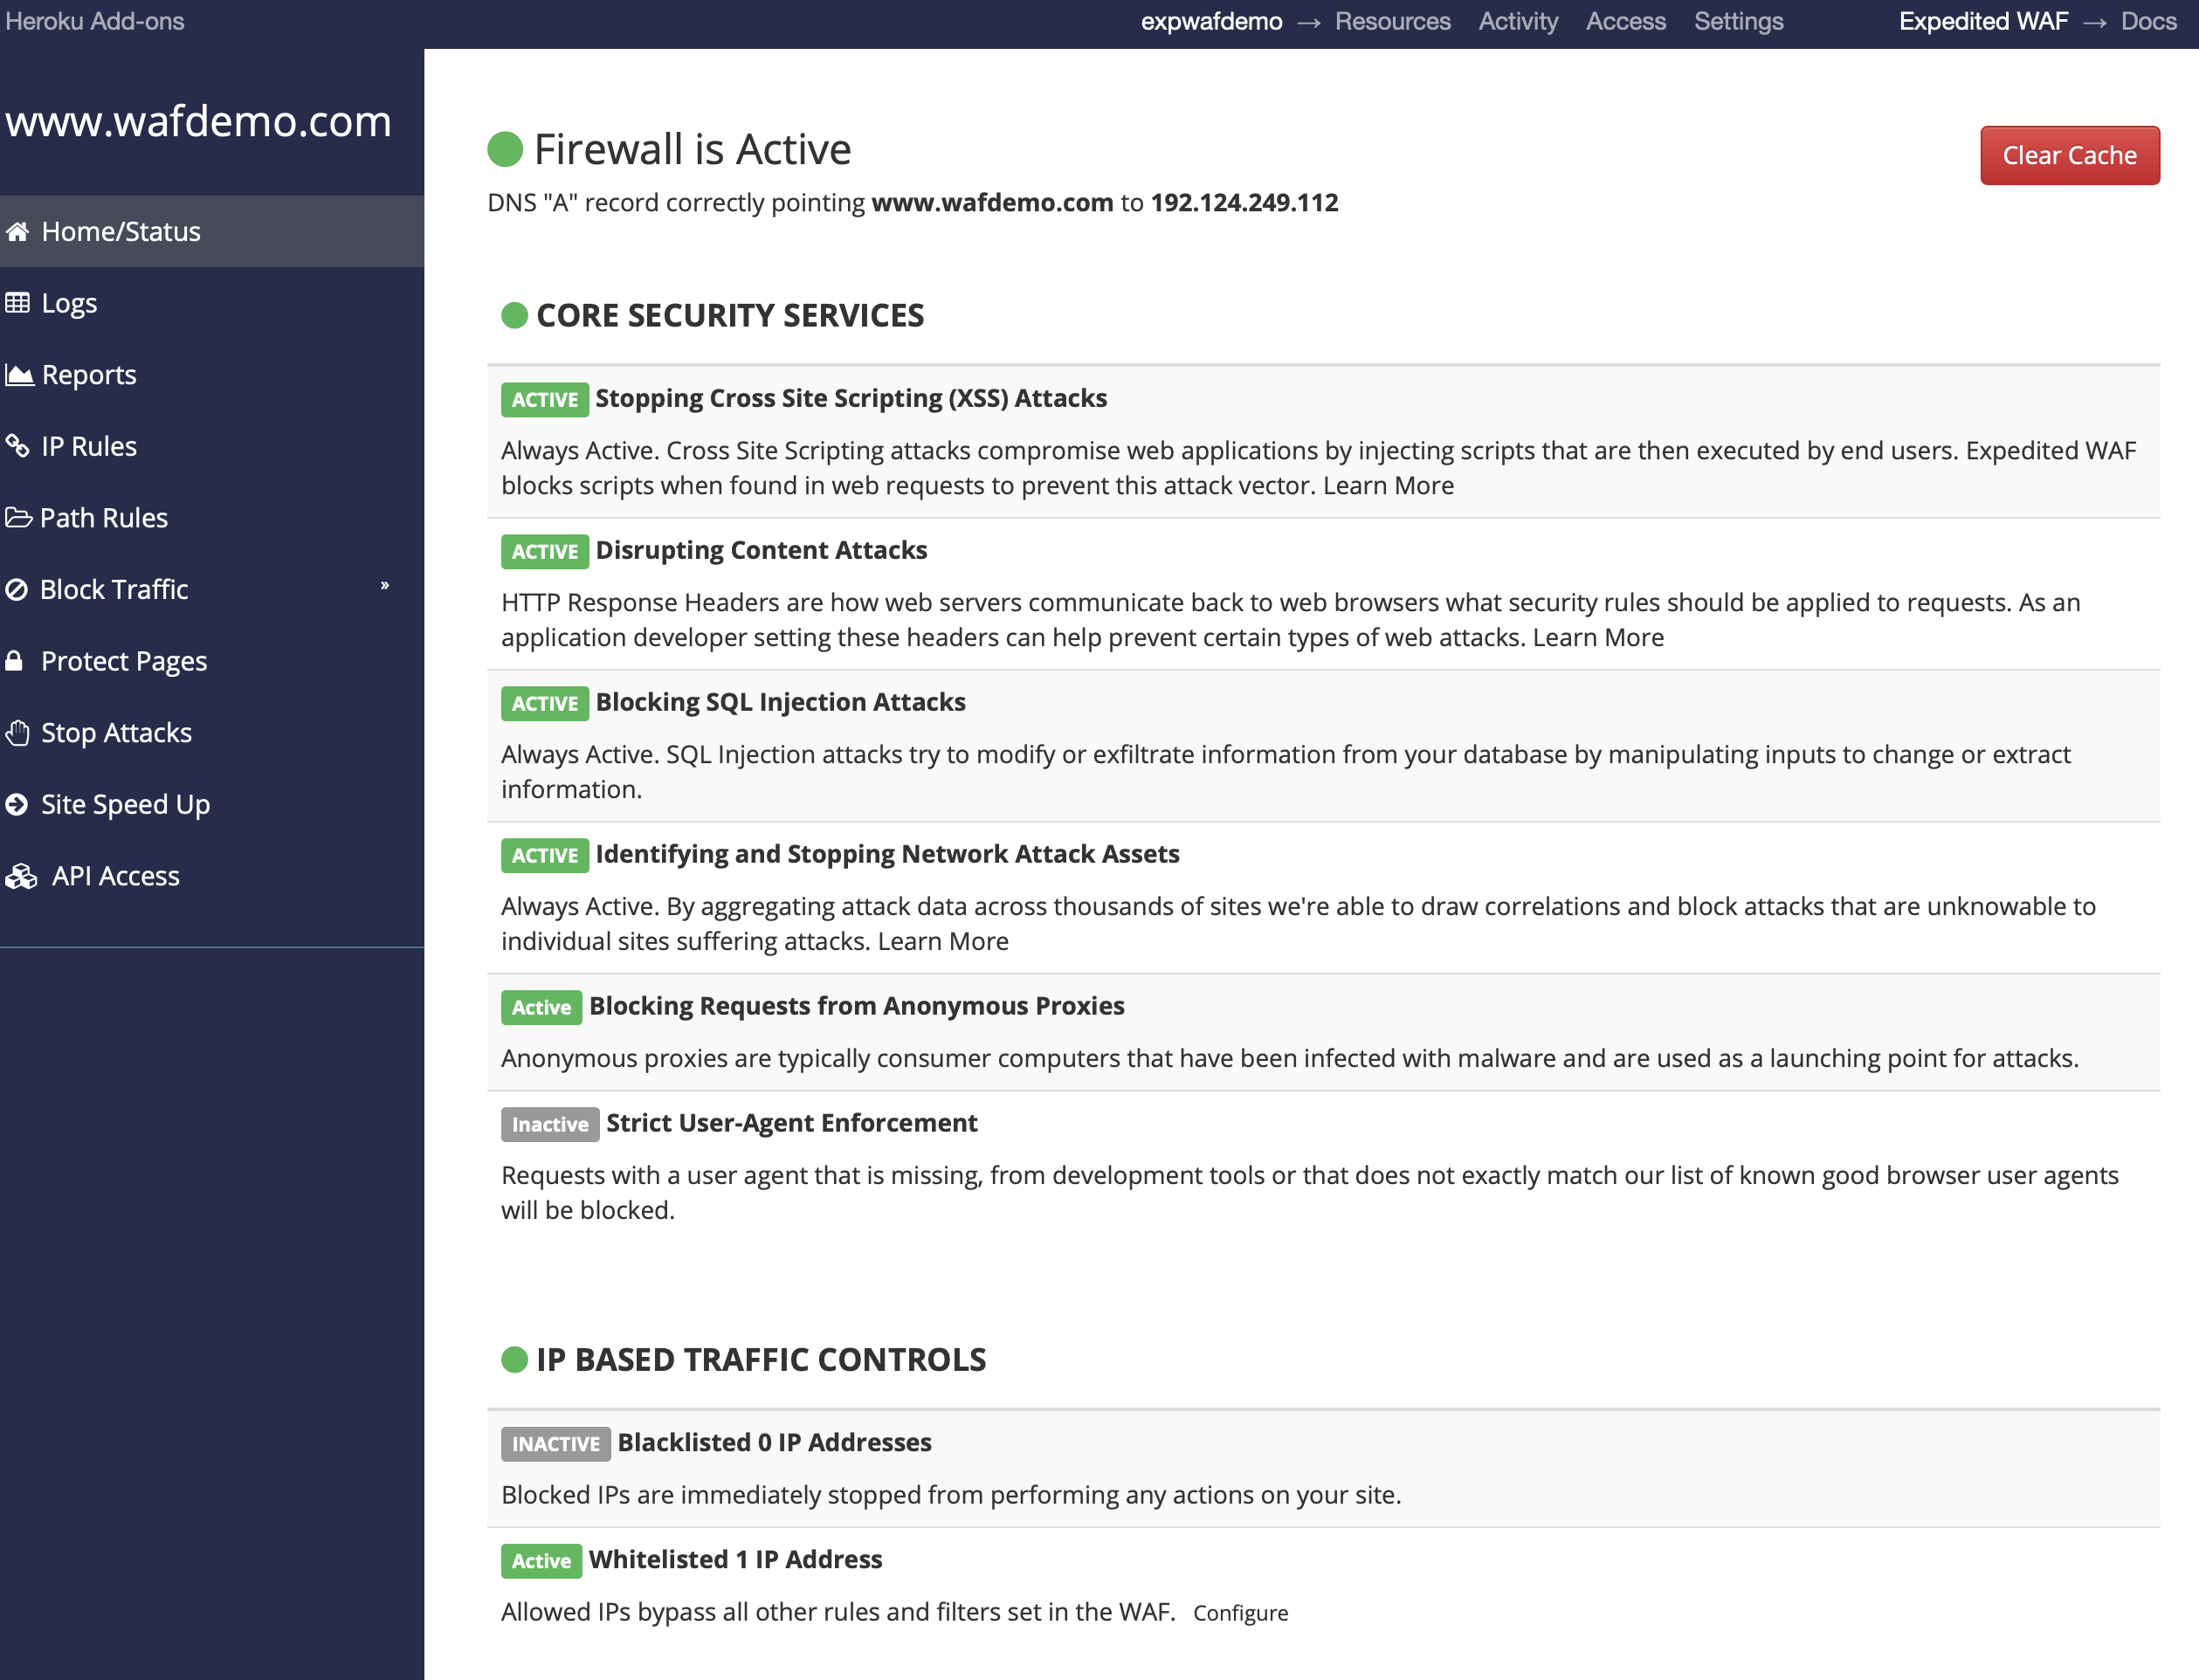
Congrats! You now have Expedited WAF installed and are ready to start configuring it to your needs.